👐 Initial Setup and Access for Atlas CLI
This section will cover the required notebook operations that must be fulfilled to run the challenges.
Open the template notebook
We recommend using one of the online environments below to run Jupyter Notebooks.
| Instruqt | Google Colab | GitHub Codespaces | Clone locally |
|---|---|---|---|
| Open In Instruqt | Template notebook |
1. Install Atlas CLI on the notebook environment.
Run the 1st cell in the notebook to install the Atlas CLI, a command line interface to manage MongoDB clusters.
If you're running the notebook in a Codespace you'll be prompted to install two suggested extensions: a Python environment and Jupyter Notebooks support. Install them. When finsished, select the Python environment when prompted.
# Install atlas-cli

!wget https://fastdl.mongodb.org/mongocli/mongodb-atlas-cli_1.46.3_linux_x86_64.deb
!sudo dpkg -i mongodb-atlas-cli_1.46.3_linux_x86_64.deb

# If you require sudo privilege, run the following instead:
# !sudo dpkg -i mongodb-atlas-cli_1.46.3_linux_x86_64.deb
2. Authenticate the CLI against your Atlas organization.
atlas auth login typically enters interactive mode.
We are piping a new line character so that it selects a default organization for you.
# Authenticate with Atlas CLI
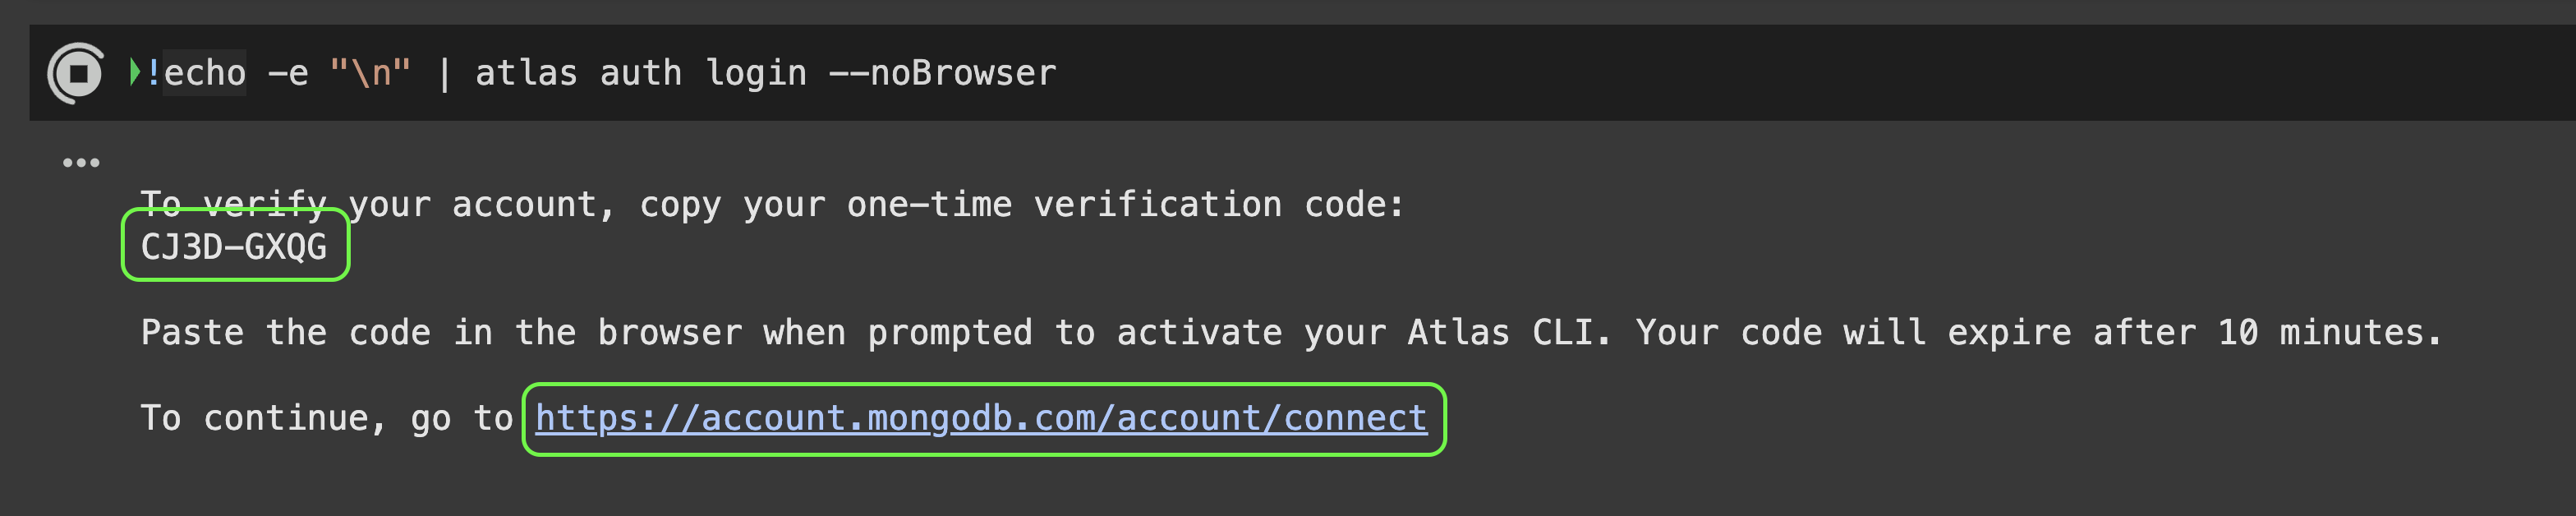
!echo -e "\n" | atlas auth login --noBrowser
Important! This task requires you to click the connect link https://account.mongodb.com/account/connect and input the eight-digit code prompted.
Once logged in, you should see a success mark on that cell.
Expand to see example
Run the cell and get the verification code as well as the authentication link and open it in a new tab:
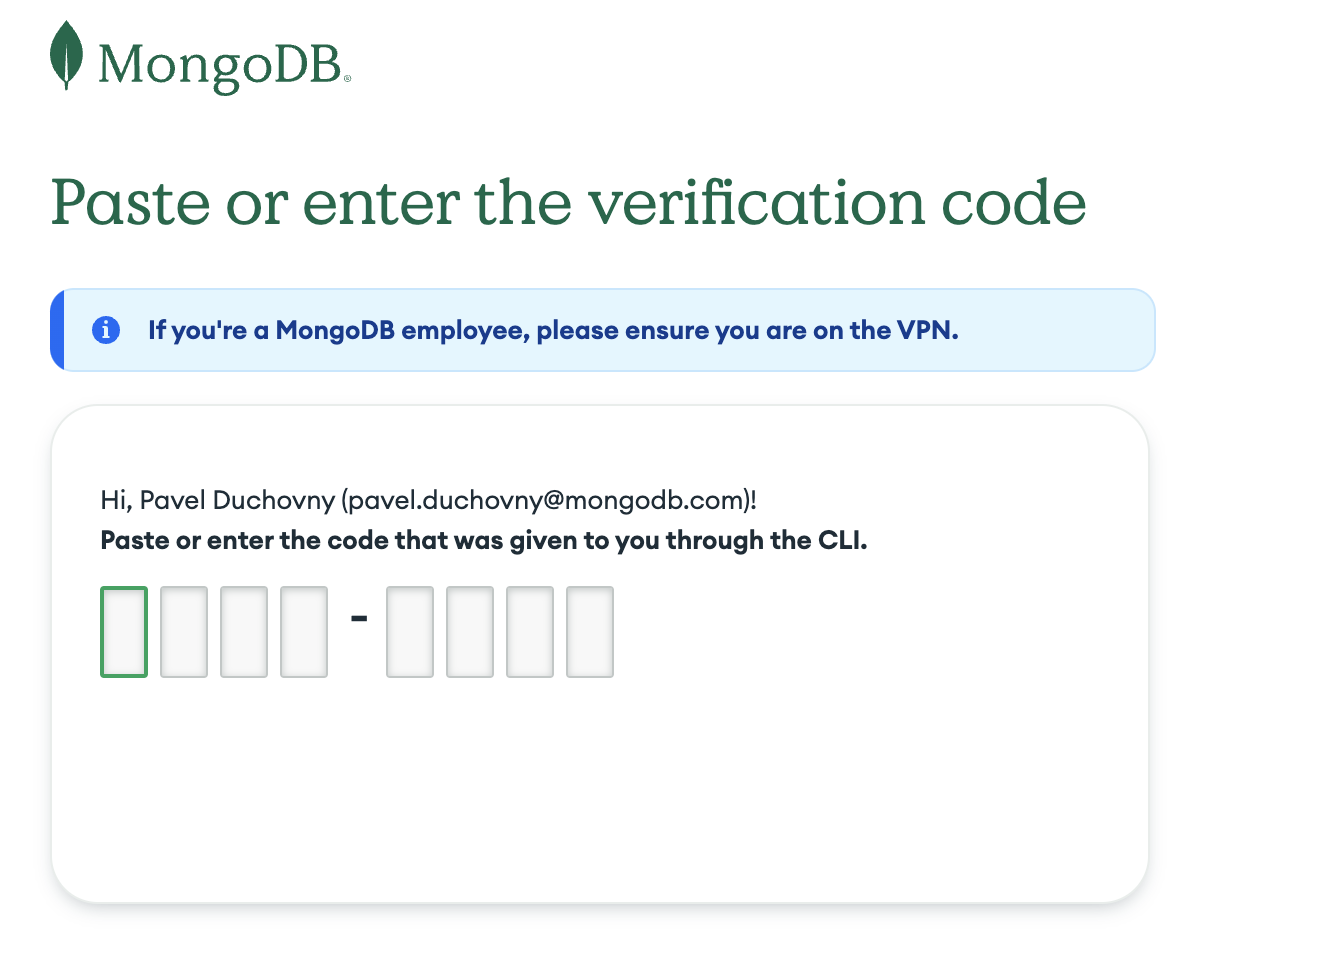
Proceed to login into https://account.mongodb.com/account/connect and provide the code in the opened authentication tab:
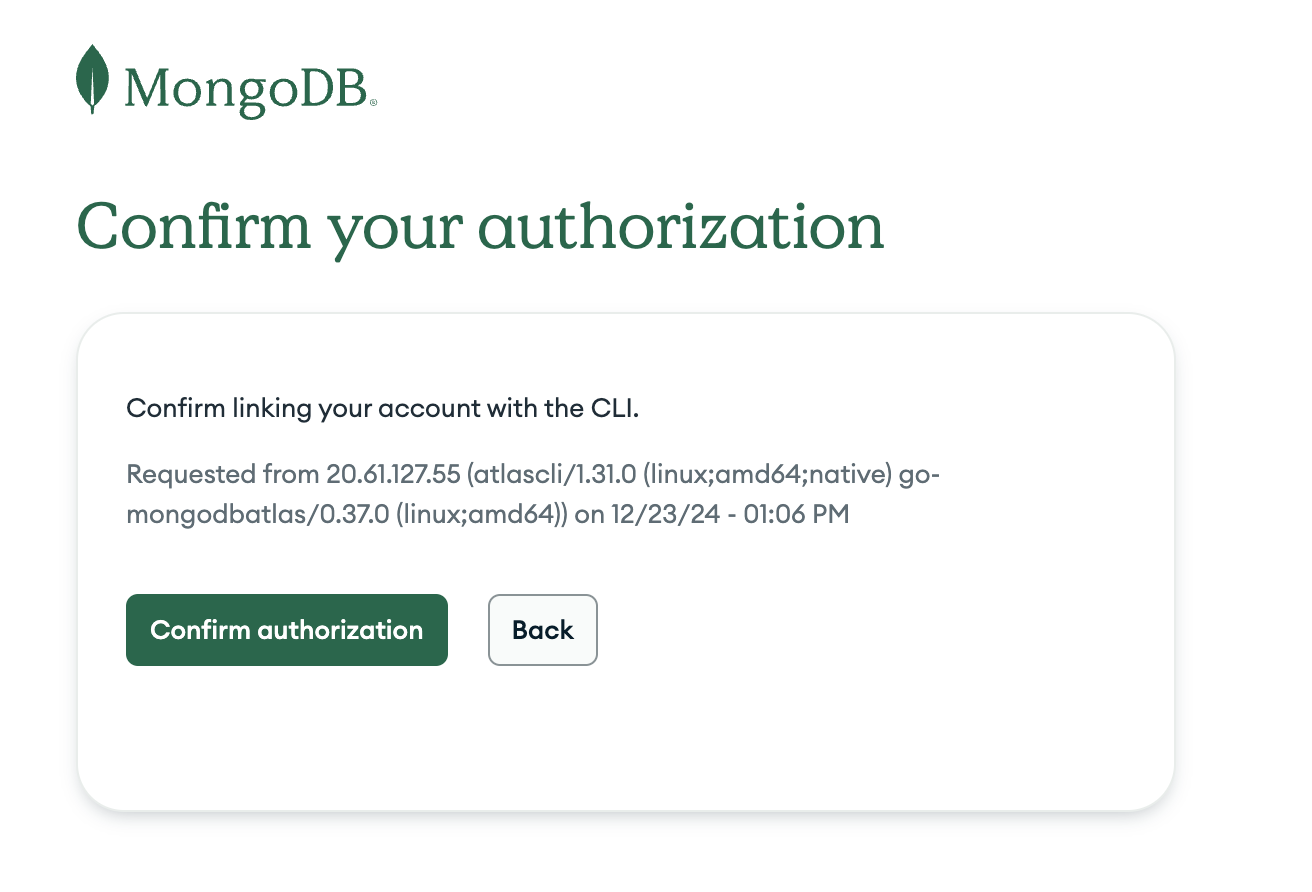
Confirm the CLI access and go back to the notebook:
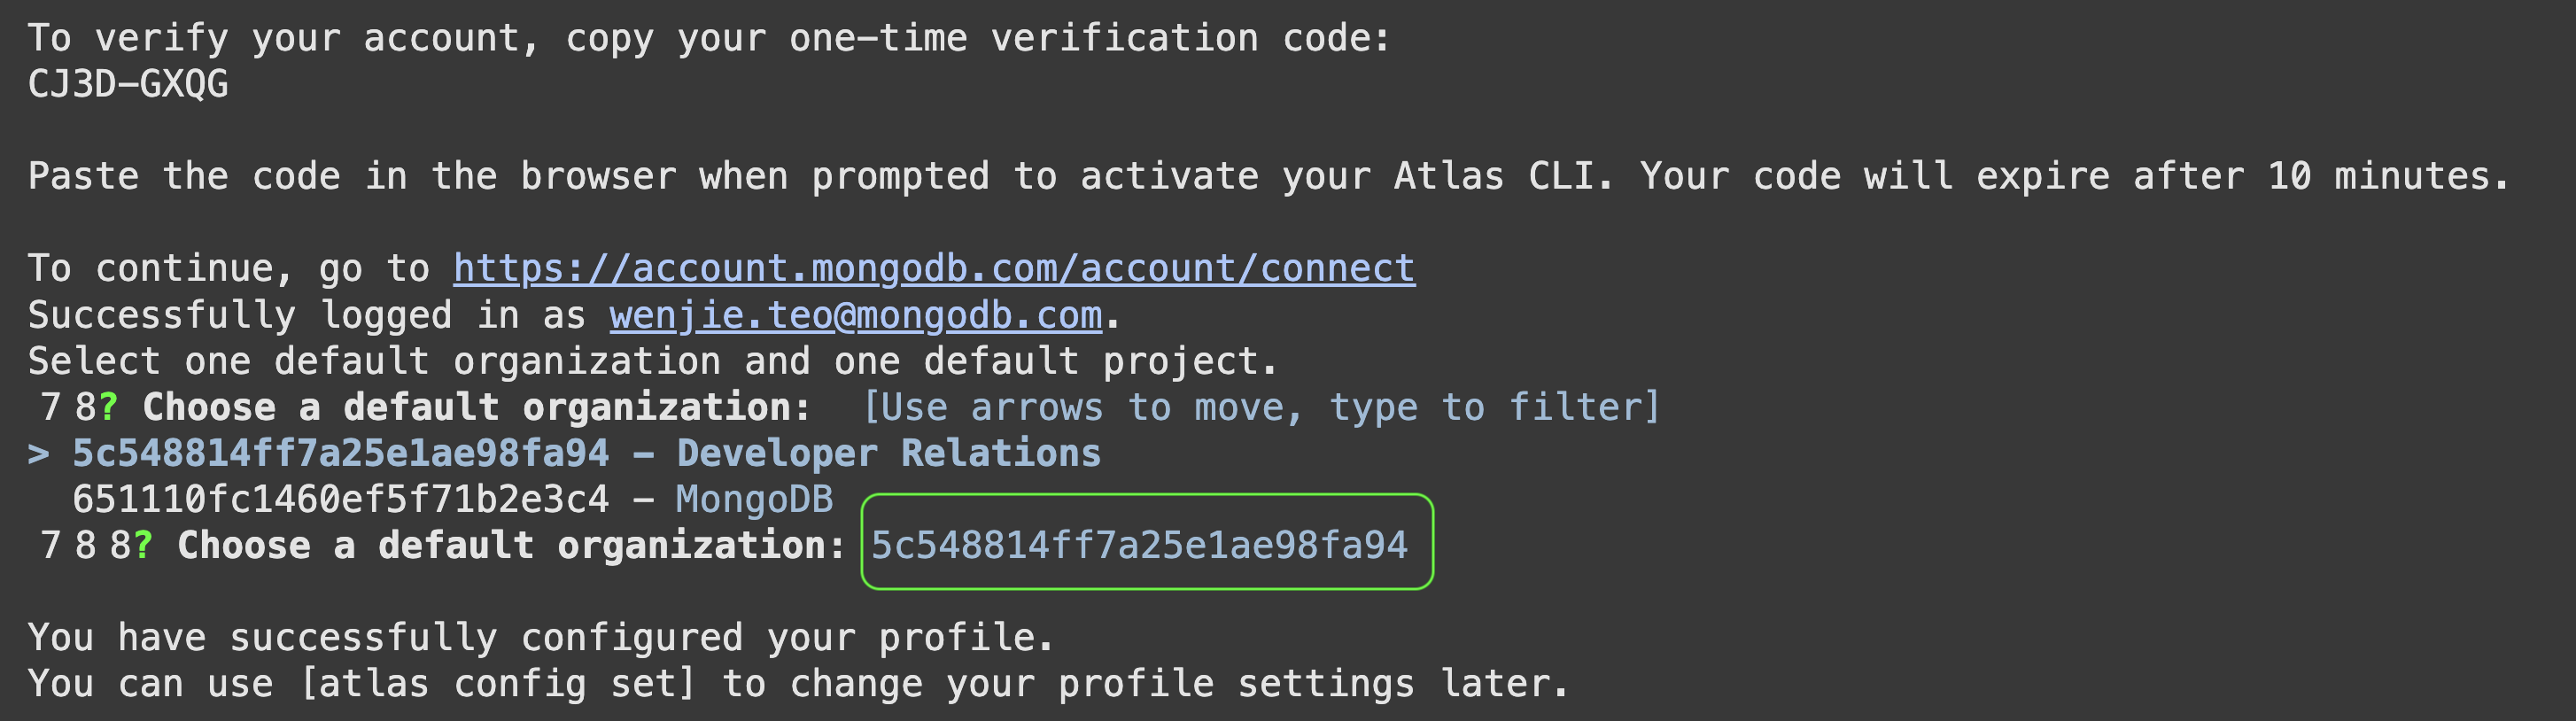
You should see an output in the notebook cell similar to:
To verify your account, copy your one-time verification code:
X9G4-KP98

Paste the code in the browser when prompted to activate your Atlas CLI. Your code will expire after 10 minutes.

To continue, go to https://account.mongodb.com/account/connect
Successfully logged in as pavel.duchovny@mongodb.com.

...
2.1 Get the organization ID
If you are a member of more than one Atlas organization, after login in you'll see a list of your organizations and you can select the one you prefer to run the lab. But if you're using a free account you only have one organization, and the list won't appear.
- You have more than one organization
- You have only one organization (free accounts most likely)
Take a note of the relevant Organization ID for next steps and "STOP" the cell.
You won't see any organization id in the response. Run the 2.1 Cell Get Organization ID and copy the Organization ID.
ID                         NAME
31415926535                My Org's Name
3. Create a new project called "MySecureProj."
Replace <ORGANIZATION_ID> with the Organization ID from the previous step.
# Retain the quotes ("") when pasting the Organization ID
org_id = "<ORGANIZATION_ID>"
!atlas projects create MySecureProj --orgId {org_id}
There should be an output which shows the Project ID of the project created. Use this Project ID for the next step.
4. Create your challenge cluster.
Replace <PROJECT_ID> with the Project ID from the previous step.
This will provision an M0, free forever cluster, running in AWS in region US_EAST_1. That cluster will be associated to the project we just created.
# Retain the quotes ("") when pasting the Project ID
project_id = "<PROJECT_ID>"
# You may select a region closer to you instead of "US_EAST_1"

!atlas clusters create MyNewCluster --provider AWS --region US_EAST_1 --tier M0 --projectId {project_id}
Next steps
Progress to Network Setup for authorising access to your Atlas deployment.