Build a GraphQL API
Your next task is to build a GraphQL API that exposes some of the data in the Atlas database along with the full-text search functionality.
Create an Atlas App Service
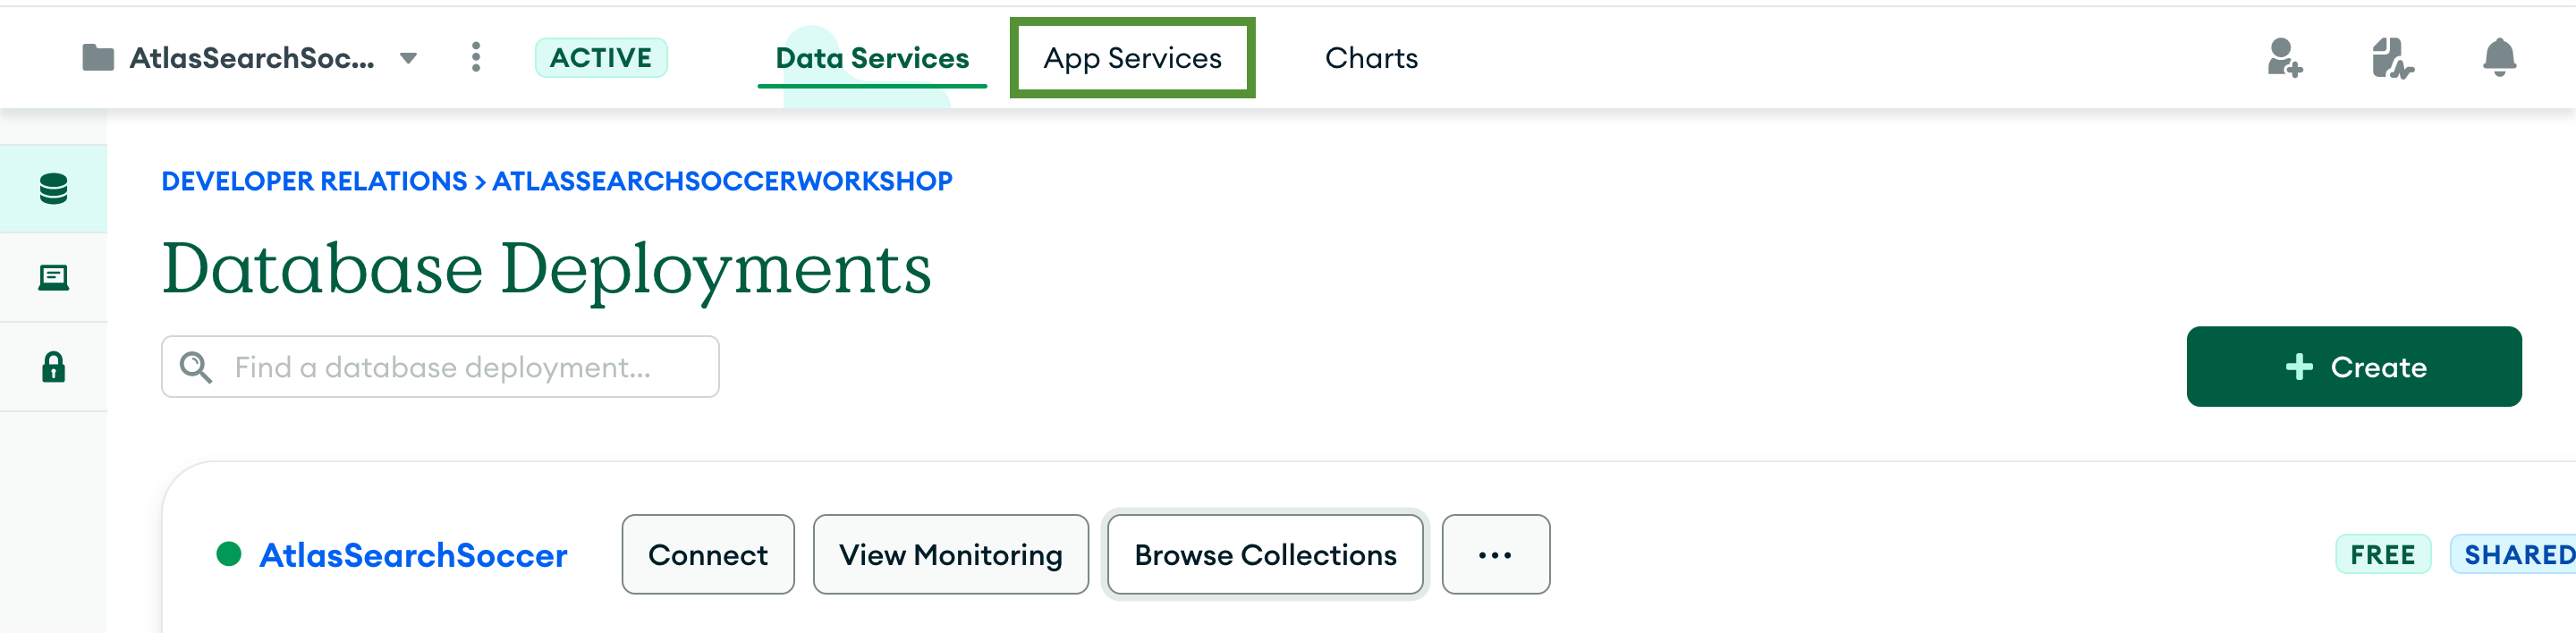
Open you Atlas database deployments and click the App Services tab.
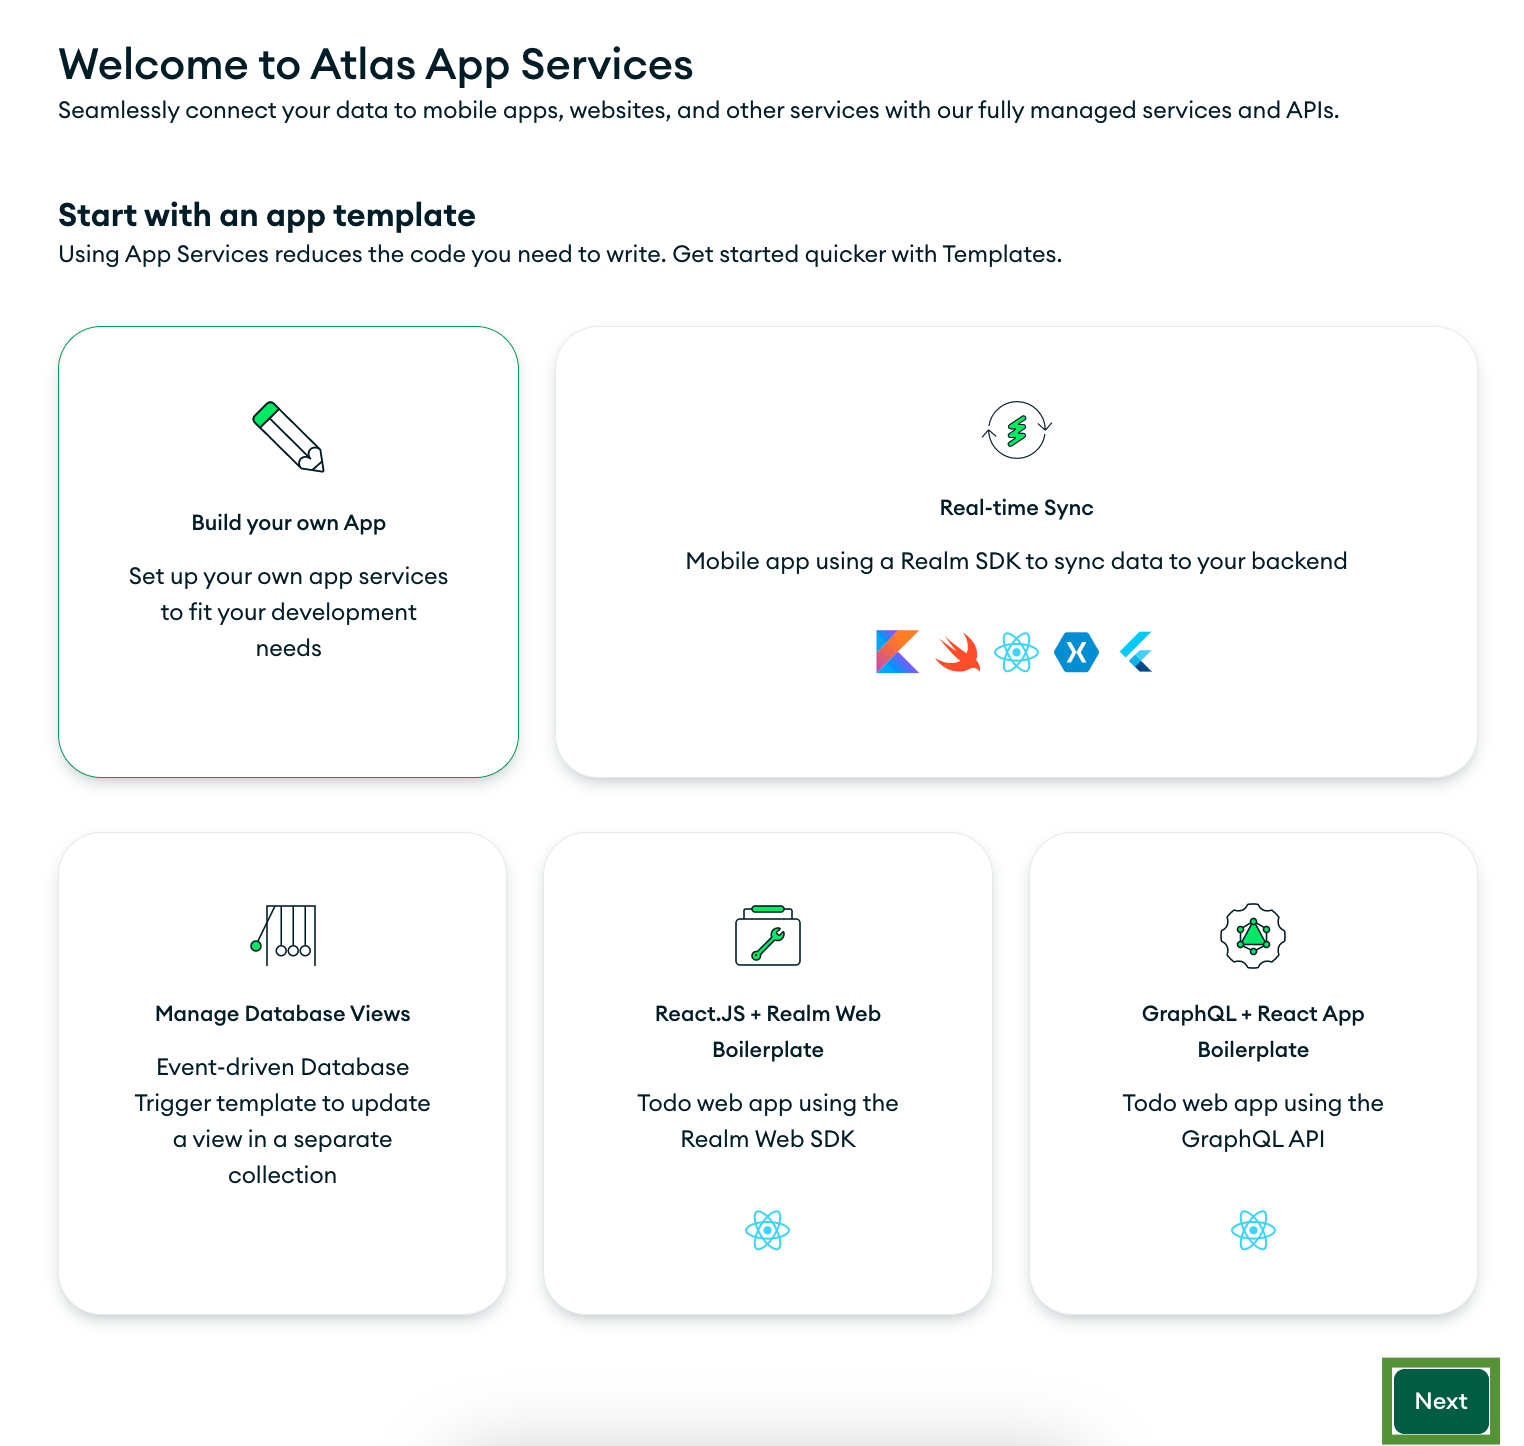
You’ll be prompted to select a starter template. Go with the default Build your own App option. Click Next.
Next, you need to configure your application.
- Link your Data Source: Since you have a single database in your project — AtlasSearchSoccer, it is already selected as a data source.
- Name your Application: Give your application the name SearchSoccerBackend.
- App Deployment Model: Make sure the deployment is set to Single Region and select the region closest to your physical location to ensure minimal latency.
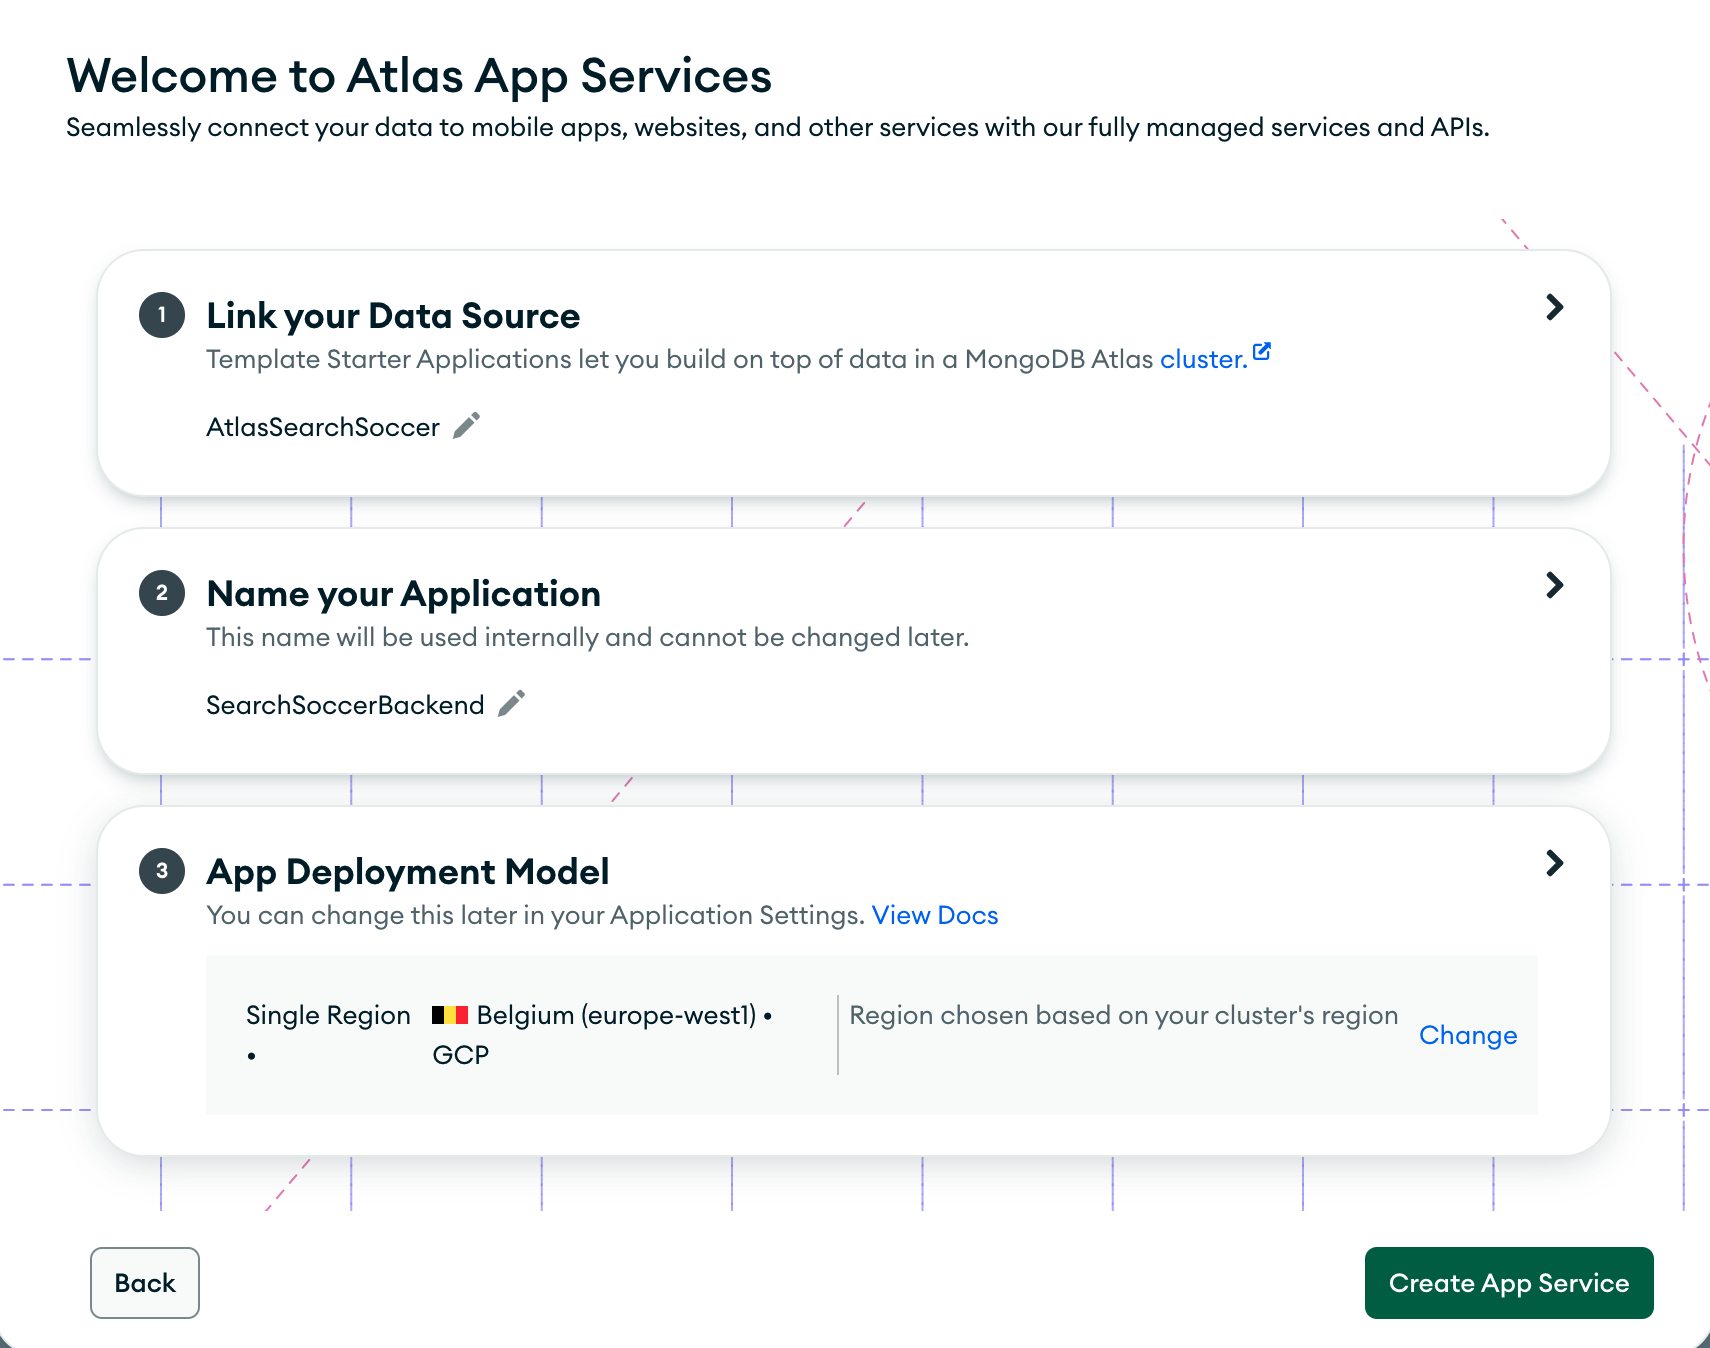
Click Create App Service.
Configure data access rules
Next, configure rules that define who can access which parts of your data.
Navigate to Rules from the side menu.
Read the helper Understanding Rules and Filters dialog and close it.
Select the players collection from the left-side column.
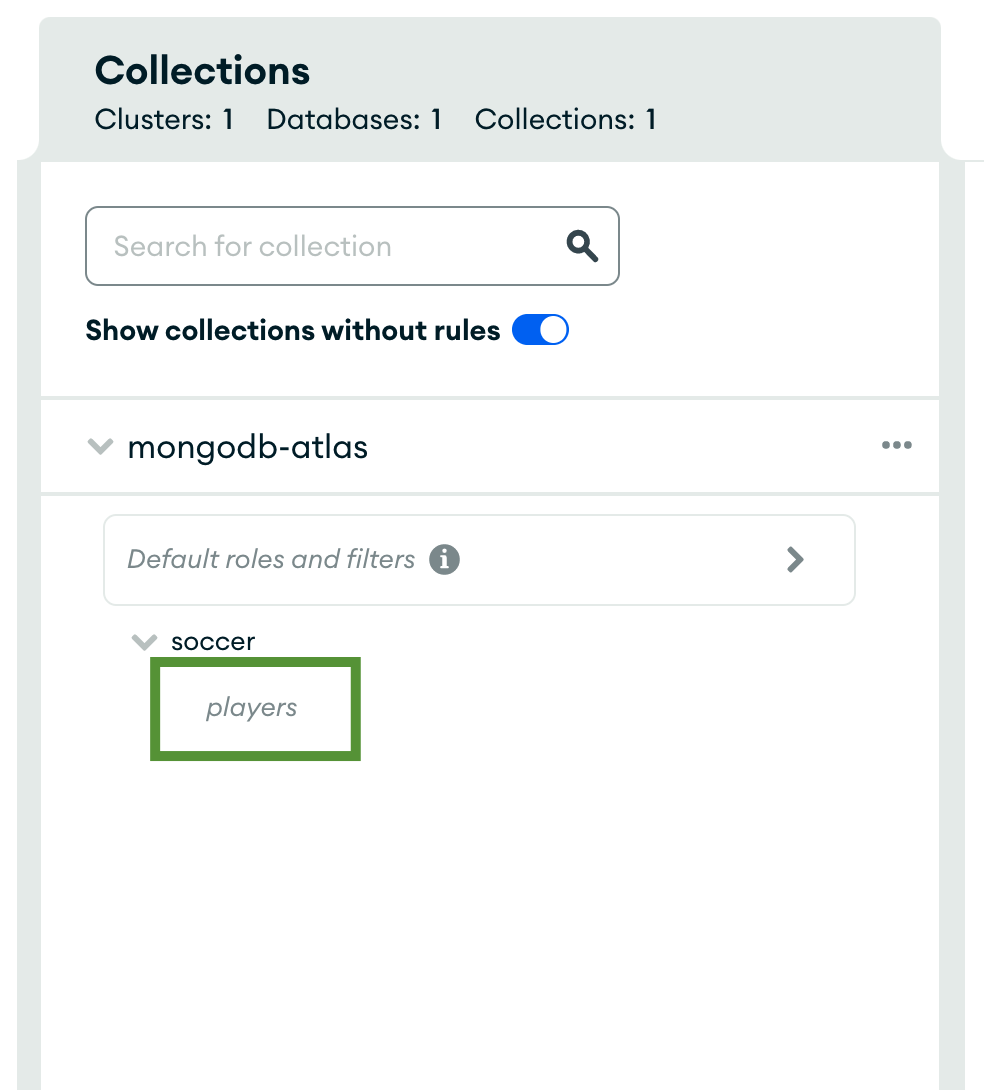
Select the readAll preset from the right-side column. Users in the web app will be able to search and find players but not modify them.
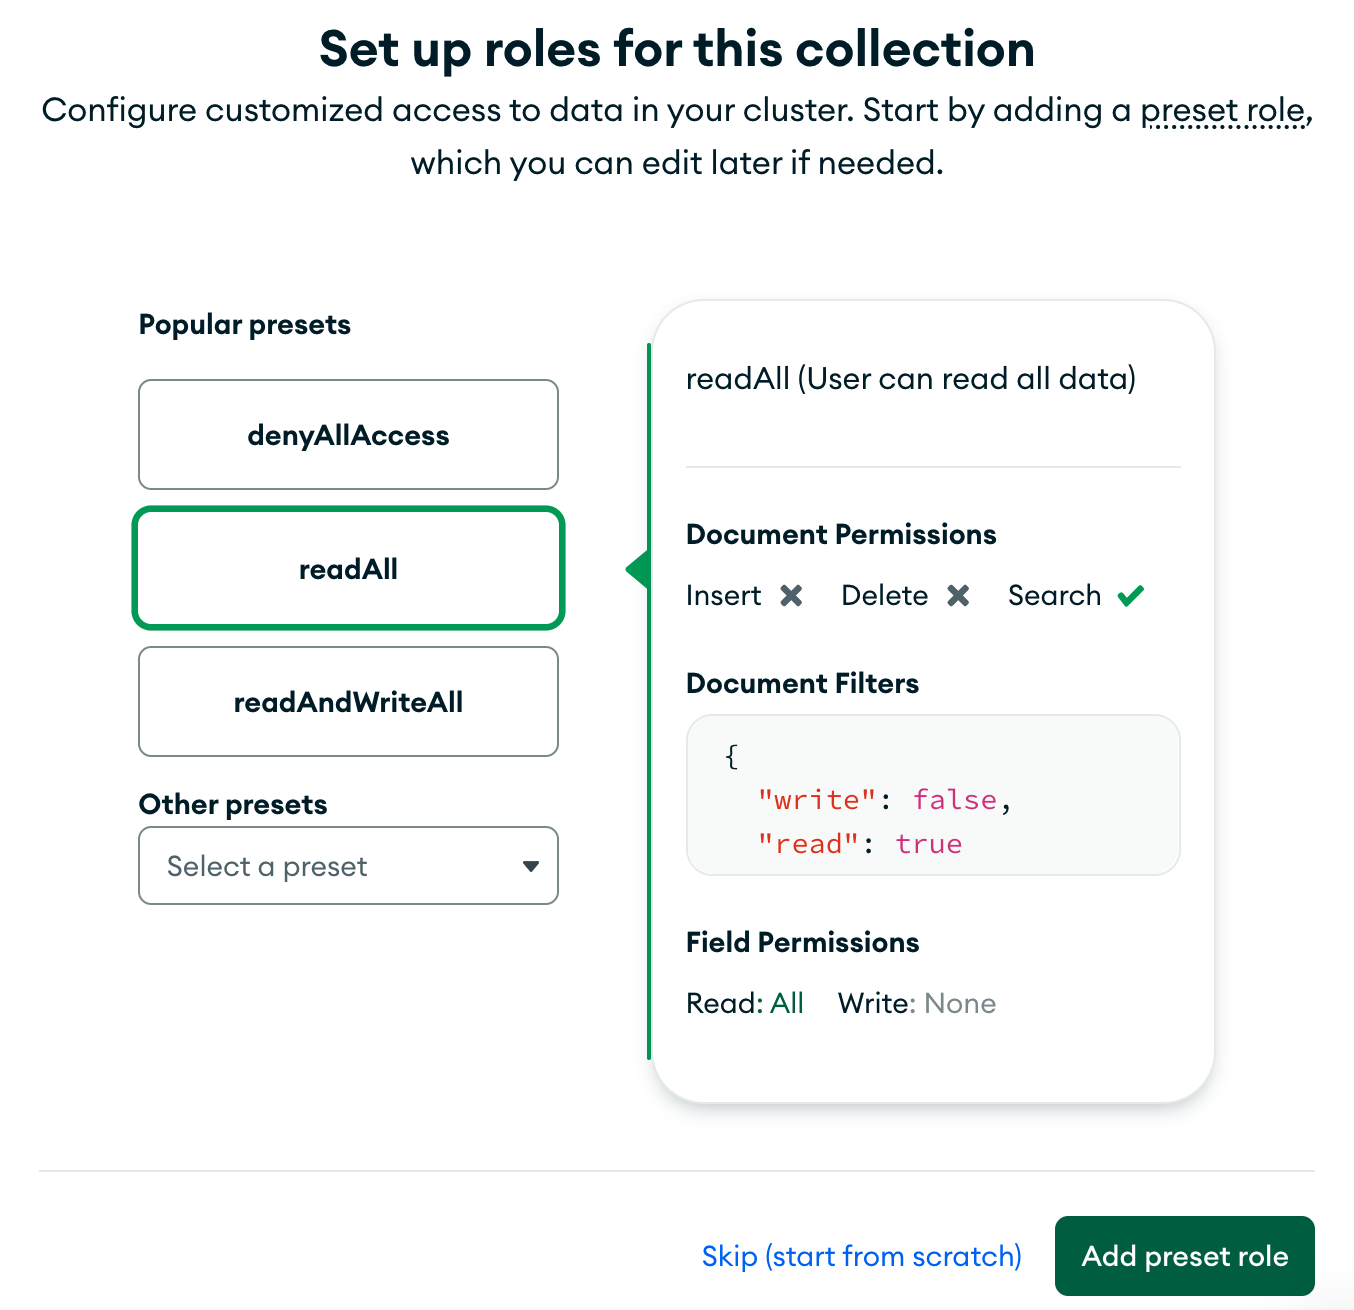
Click Add preset role.
Read the helper Understanding Save and Deploy dialog and close it. Since you have made changes to the app by adding data access rules, you need to 'deploy it'. The Review Draft & Deploy step is on by default, to protect you from making changes unintentionally.
Click Review Draft & Deploy on the blue banner that appeared across the top of the screen.
You'll see the new rules as the system has added them into a
rules.jsonfile. Scroll to the bottom and click Deploy.
Define a schema
GraphQL APIs require defining a strongly-typed schema. The schema acts a communication contract between the client and the server.
From the side menu navigate to Schema.
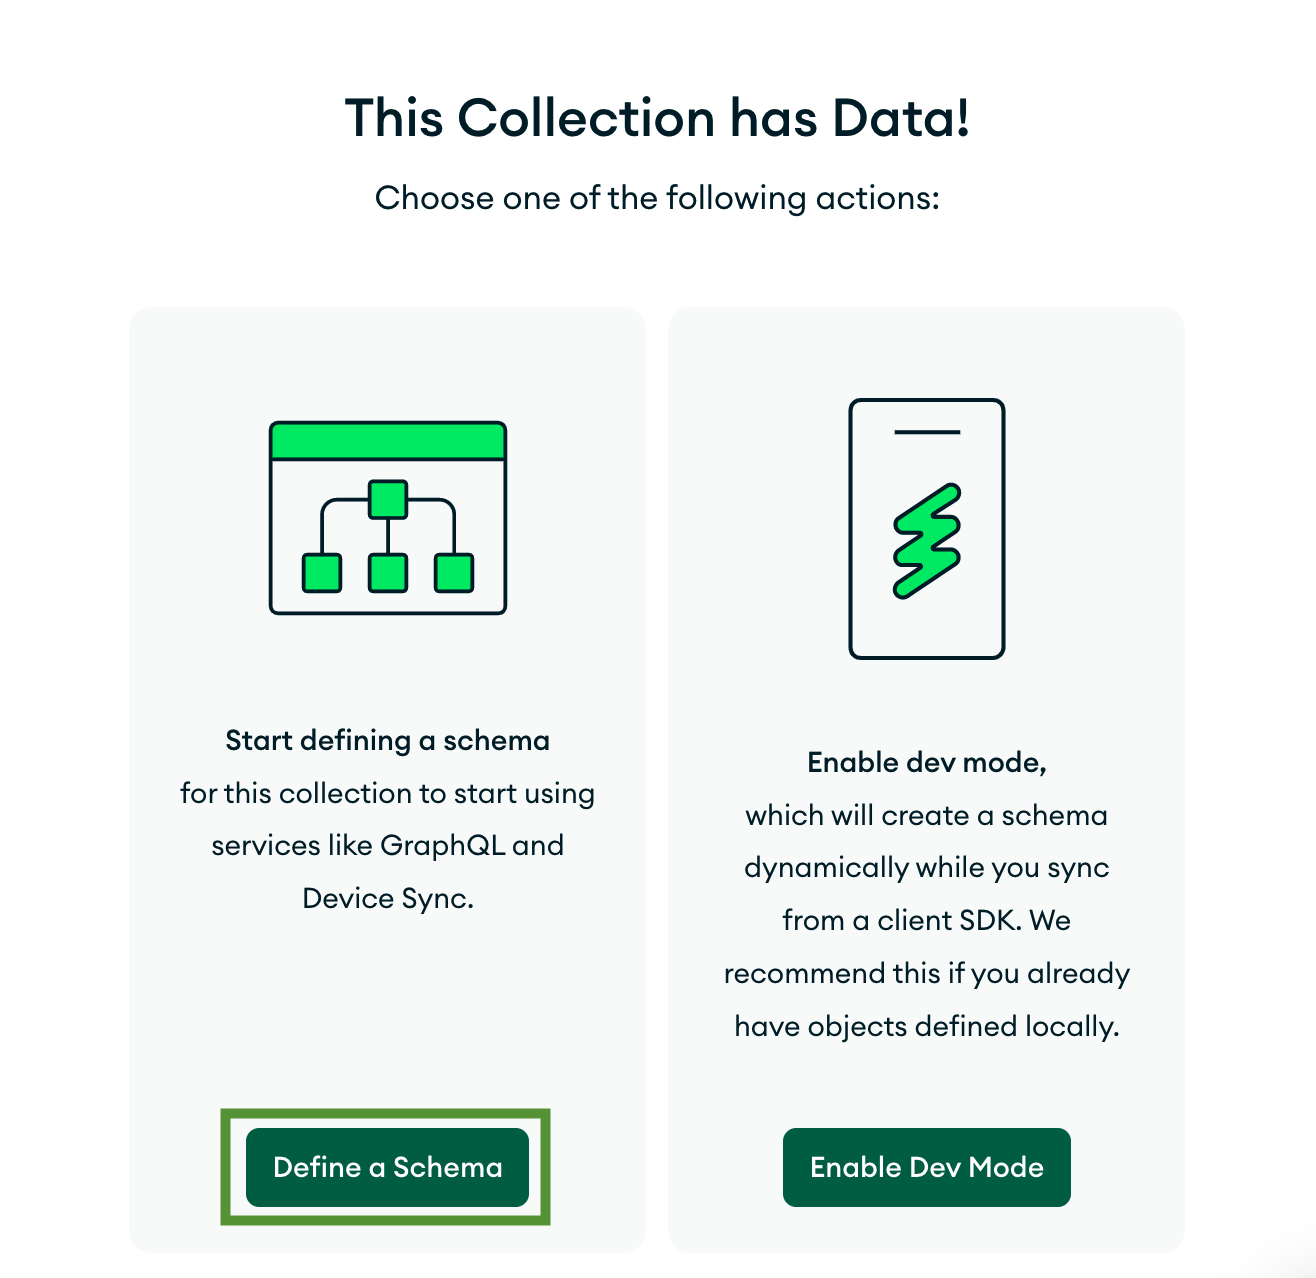
Select the players collection from the left-side column.
Click Define a Schema from the ride-side column.
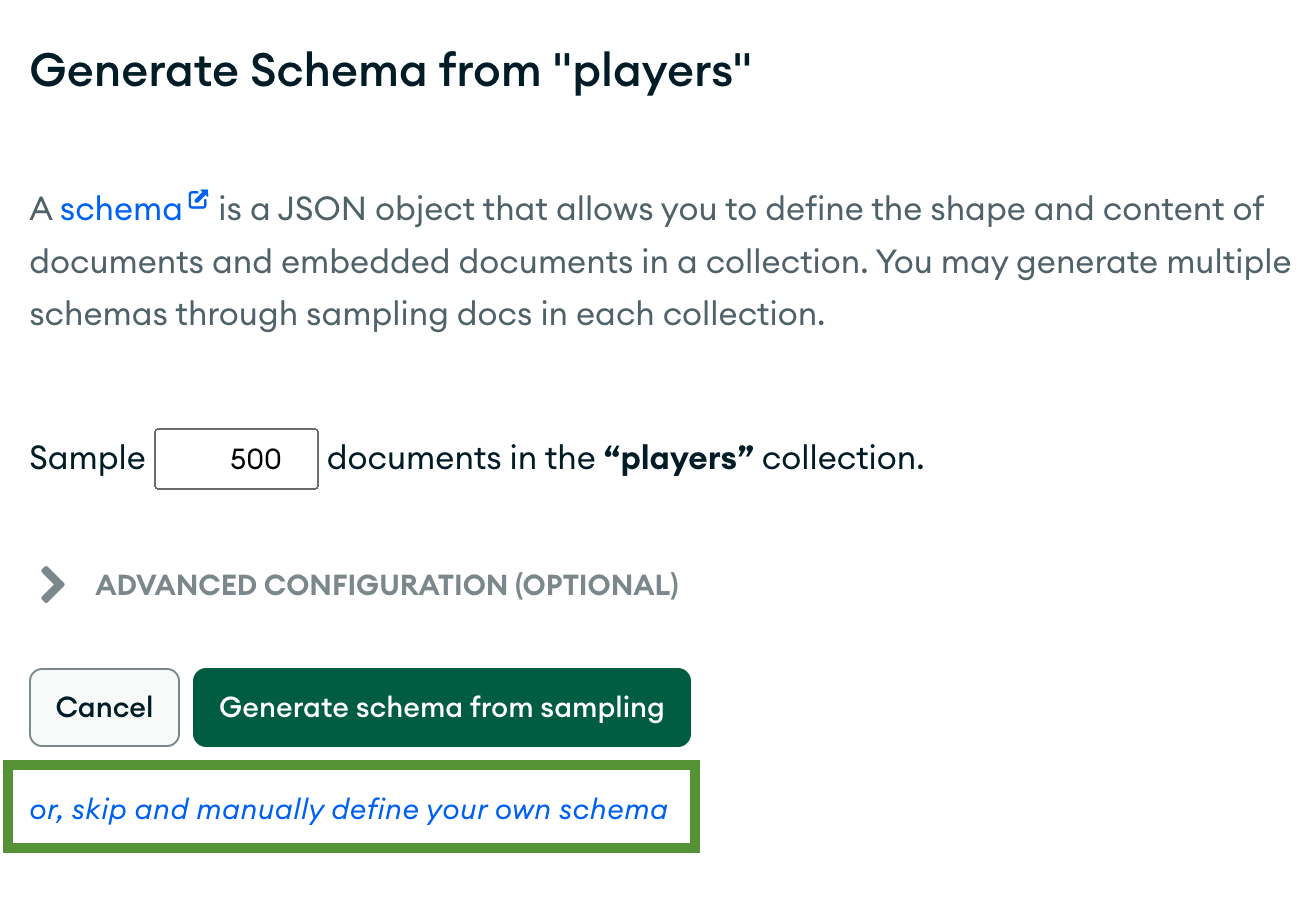
Then, click "or, skip and manually define your own schema".
Add the JSON schema below.
{
    "title": "player",
    "properties": {
        "_id": {
            "bsonType": "objectId"
        },
        "age": {
            "bsonType": "int"
        },
        "club_flag_url": {
            "bsonType": "string"
        },
        "club_jersey_number": {
            "bsonType": "int"
        },
        "club_logo_url": {
            "bsonType": "string"
        },
        "club_name": {
            "bsonType": "string"
        },
        "dob": {
            "bsonType": "date"
        },
        "long_name": {
            "bsonType": "string"
        },
        "nation_flag_url": {
            "bsonType": "string"
        },
        "nation_jersey_number": {
            "bsonType": "int"
        },
        "nation_logo_url": {
            "bsonType": "string"
        },
        "nationality_name": {
            "bsonType": "string"
        },
        "overall": {
            "bsonType": "int"
        },
        "player_face_url": {
            "bsonType": "string"
        },
        "player_positions": {
            "bsonType": "string"
        },
        "player_traits": {
            "bsonType": "string"
        },
        "player_url": {
            "bsonType": "string"
        },
        "short_name": {
            "bsonType": "string"
        },
        "skill_moves": {
            "bsonType": "int"
        }
    }
}infoNote that the schema doesn't contain all fields present in the documents in the
playerscollection. Queries requesting fields not in the schema will be rejected. This allows you, to some extend, to control what data is being exposed through the API. For more fine-grained data access control you can create custom roles from the Rules section, configure authorization, or implement GraphQL resolvers executing custom logic.Click Validate to verify that the schema matches the field names and types of data in the collection.
Click Review Draft & Deploy on the blue banner that appeared across the top of the screen.
Click Deploy.
Query the GraphQL API
Navigate to the GraphQL tab under the Build section on the side menu.
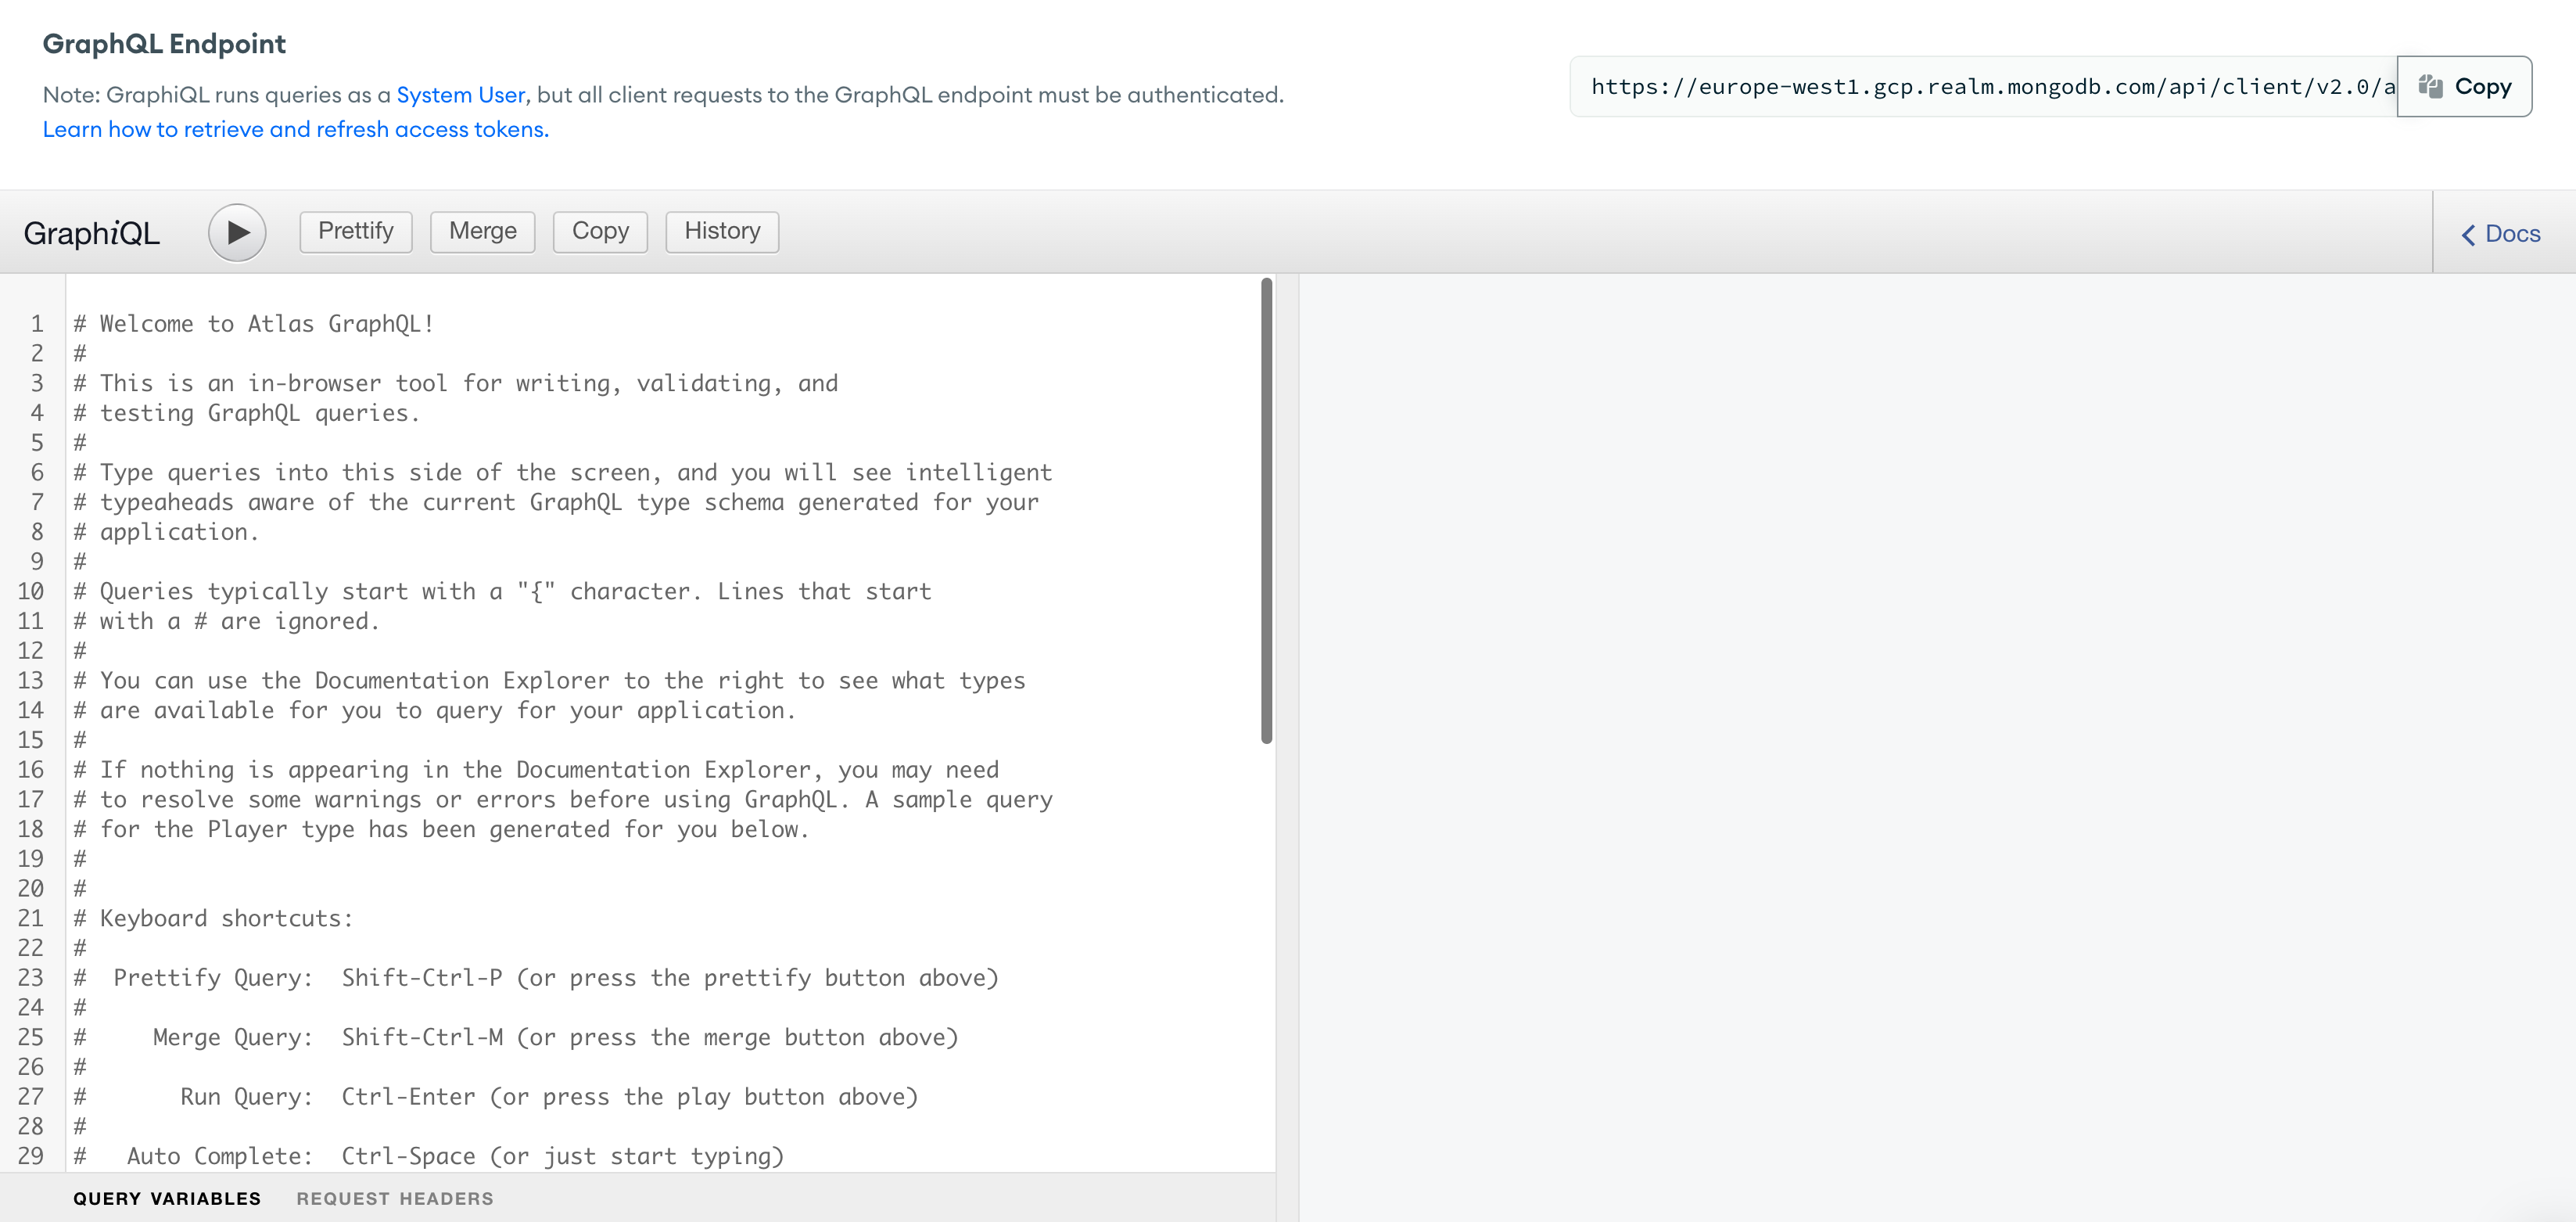 info
infoYou see a GraphiQL editor (note the i after Graph). GraphiQL is an integrated development environment (IDE) for exploring GraphQL APIs.
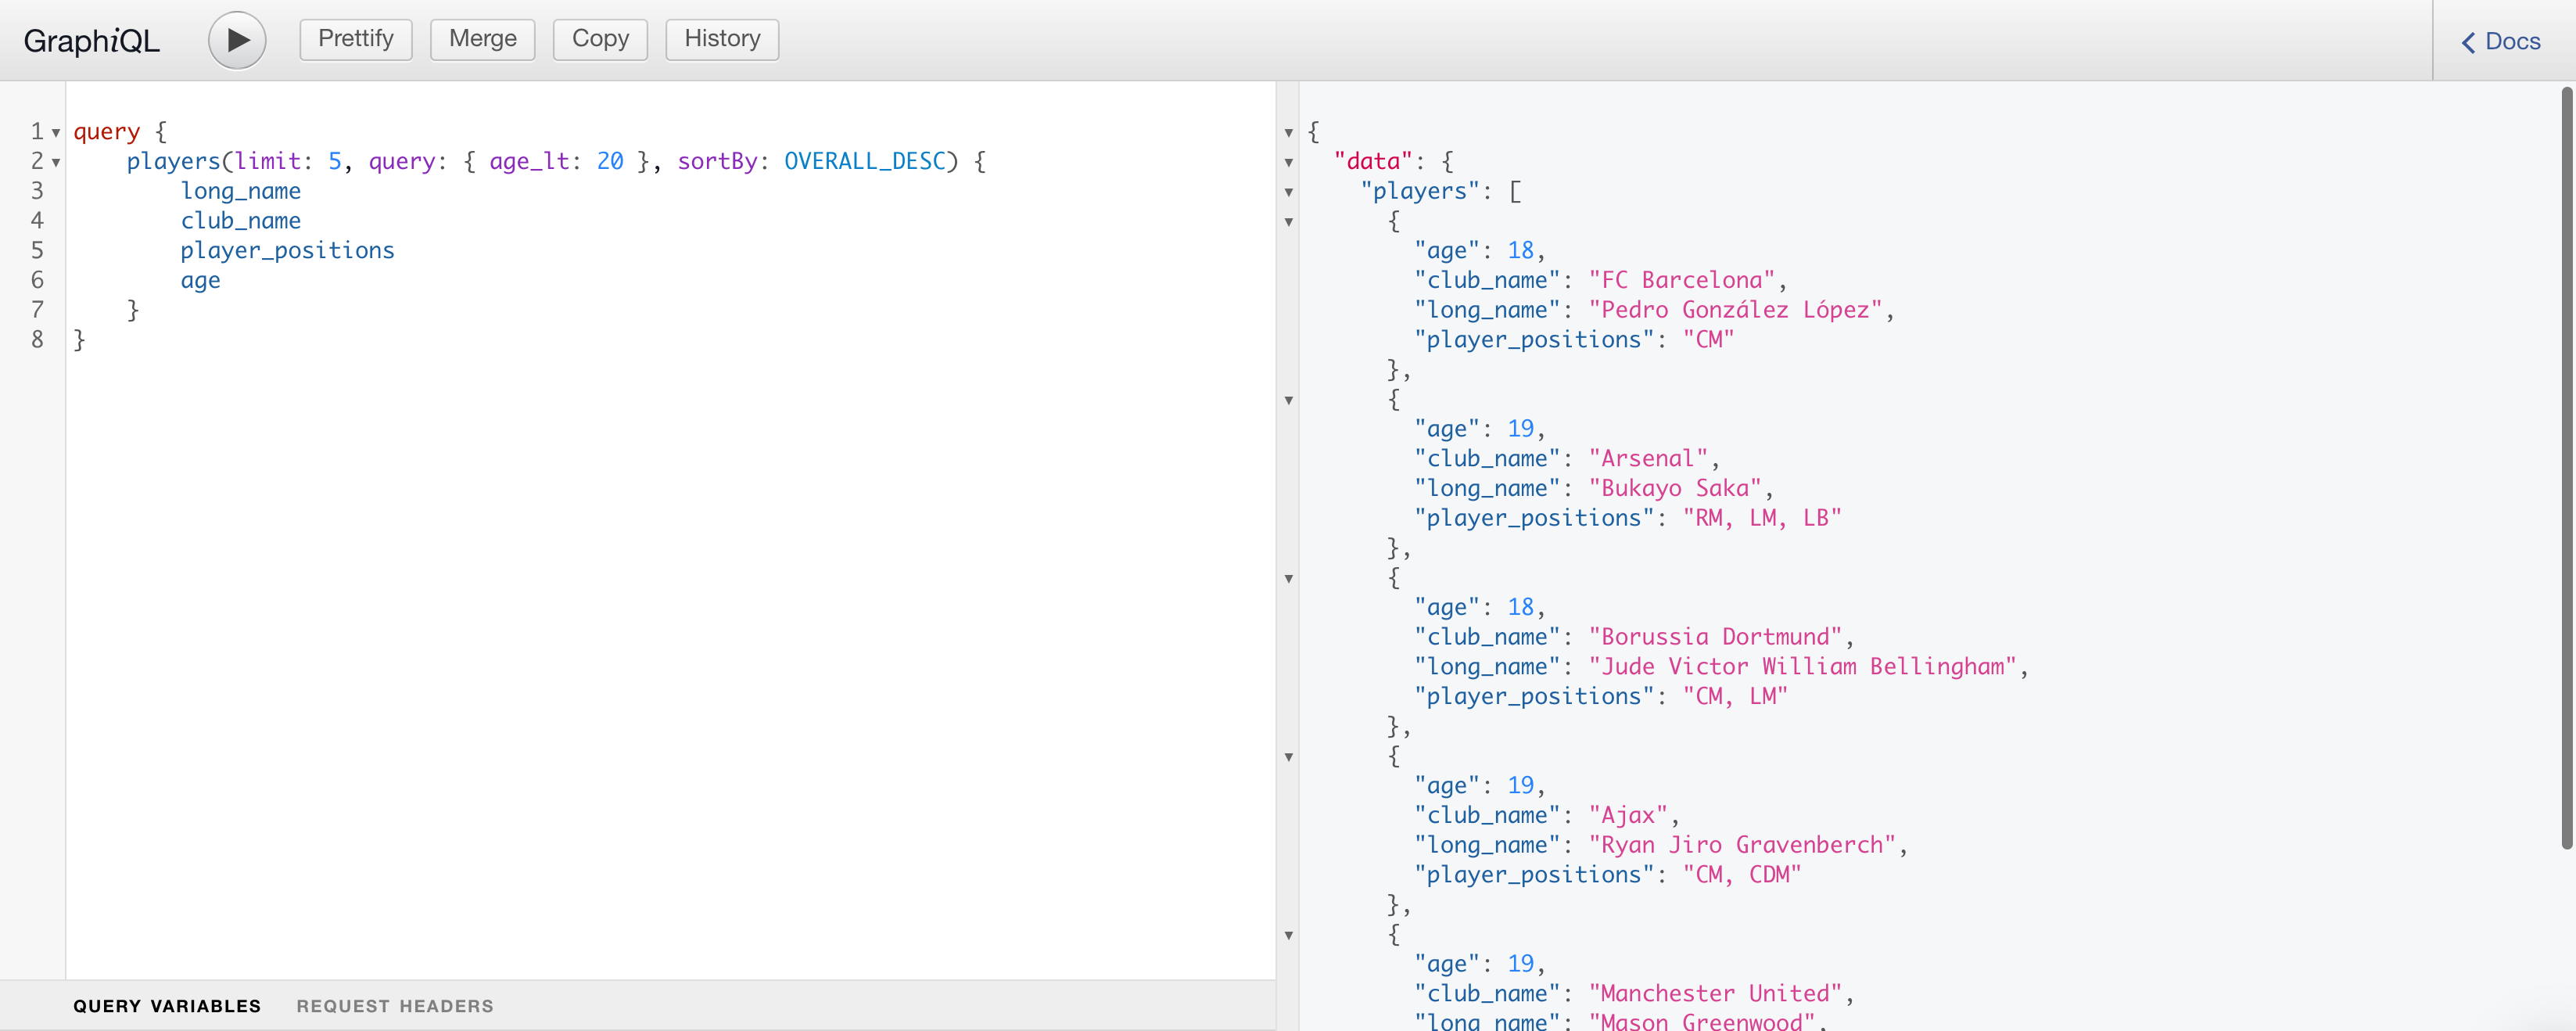
Delete the text in the GraphiQL code editor on the left and add the following GraphQL query.
query {
    players(limit: 5, query: { age_lt: 20 }, sortBy: OVERALL_DESC) {
        long_name
        club_name
        player_positions
        age
    }
}
The query returns five players of age 20 or below, sorted by their
overallfield in descending order. The query returns only the four defined fields —long_name,club_name,player_positions, andagefrom each document.Click the execute button at the top of the editor to run your query, and see your players documents returned on the right.