👐 Setup dev environment
Our AI labs use Jupyter Notebooks, which is an interactive Python environment. If you are new to Jupyter Notebooks, use this guide to familiarize yourself with the environment.
You have a few different options to run our AI labs. Our preferred platform is Instruqt.
If for some reason, you are unable to access the labs through Instruqt, try GitHub Codespaces. If neither of these work, or if you really, really, really want a local installation, only then run the labs locally.
- Instruqt
- GitHub Codespaces
- Local
Instruqt is a lab platform that provides cloud-based sandboxes which come pre-configured with all the tools you need to run the labs.
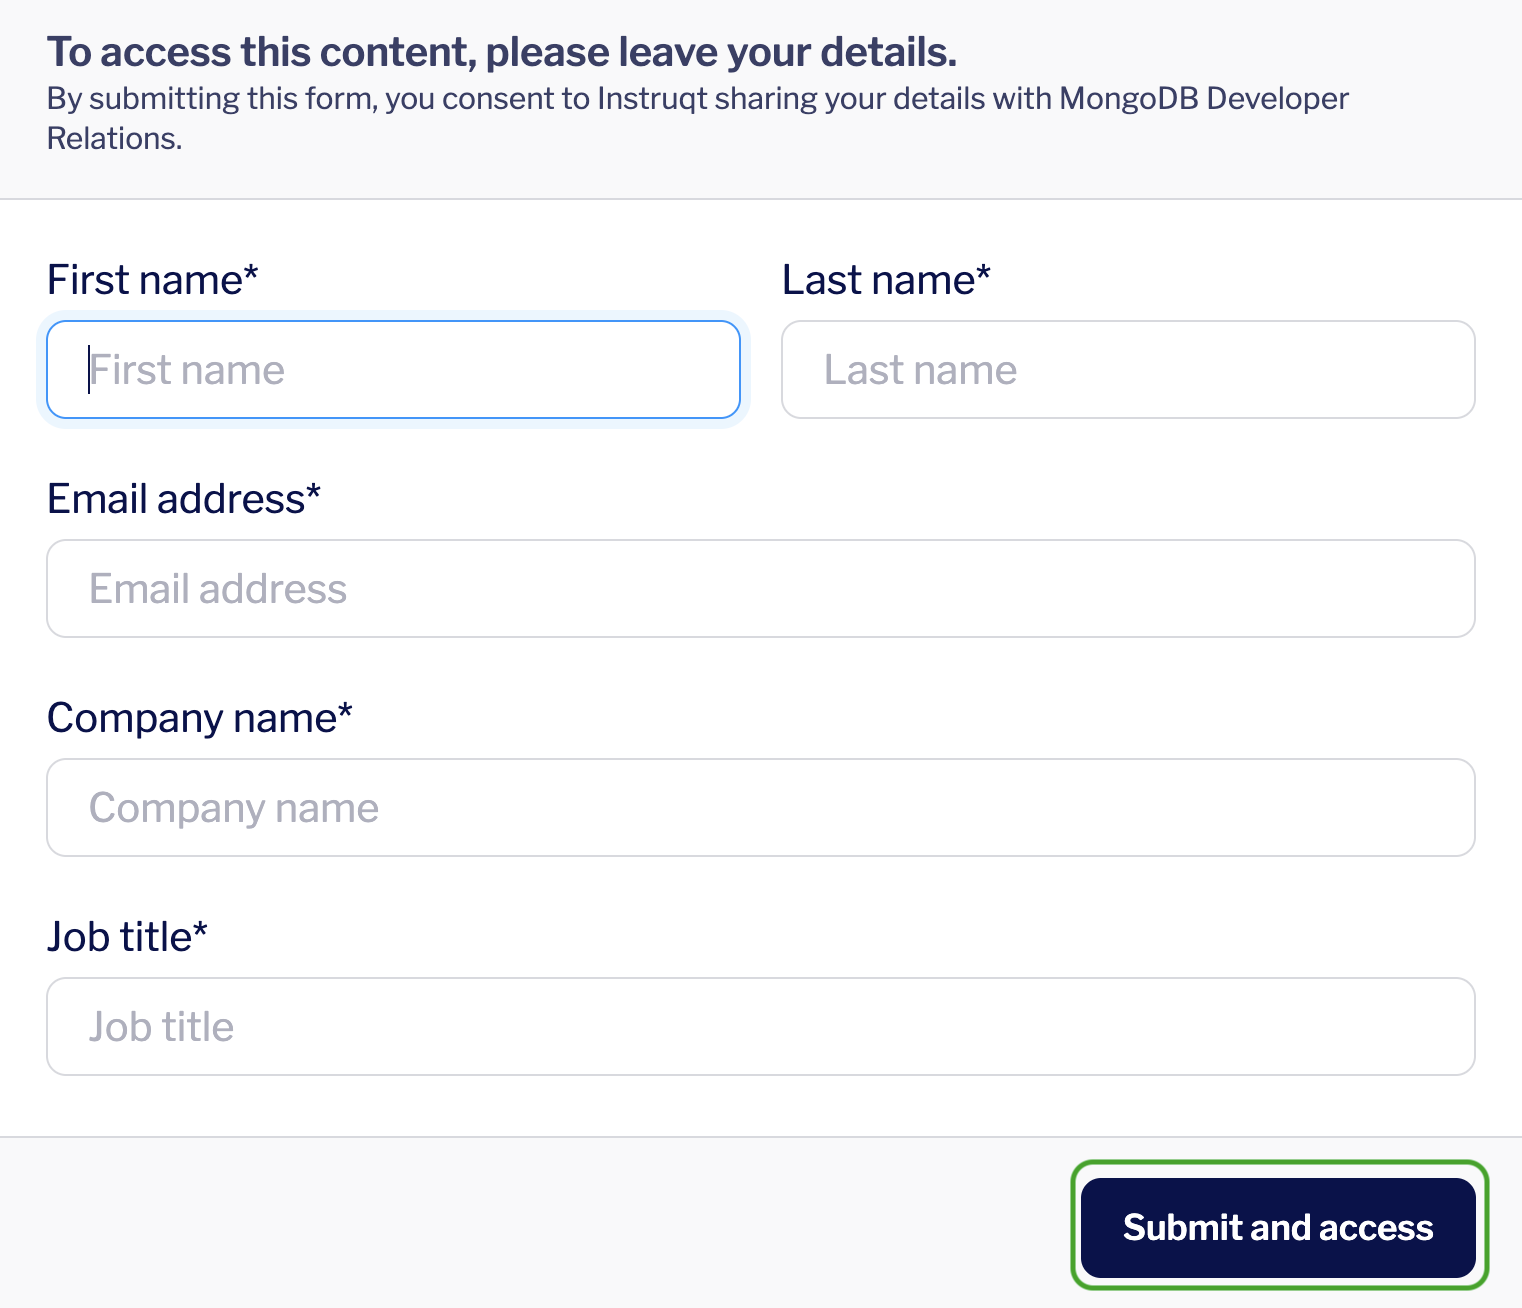
Use the instructor-provided link to navigate to the right Instruqt lab. Fill out the form that appears and click Submit and access.
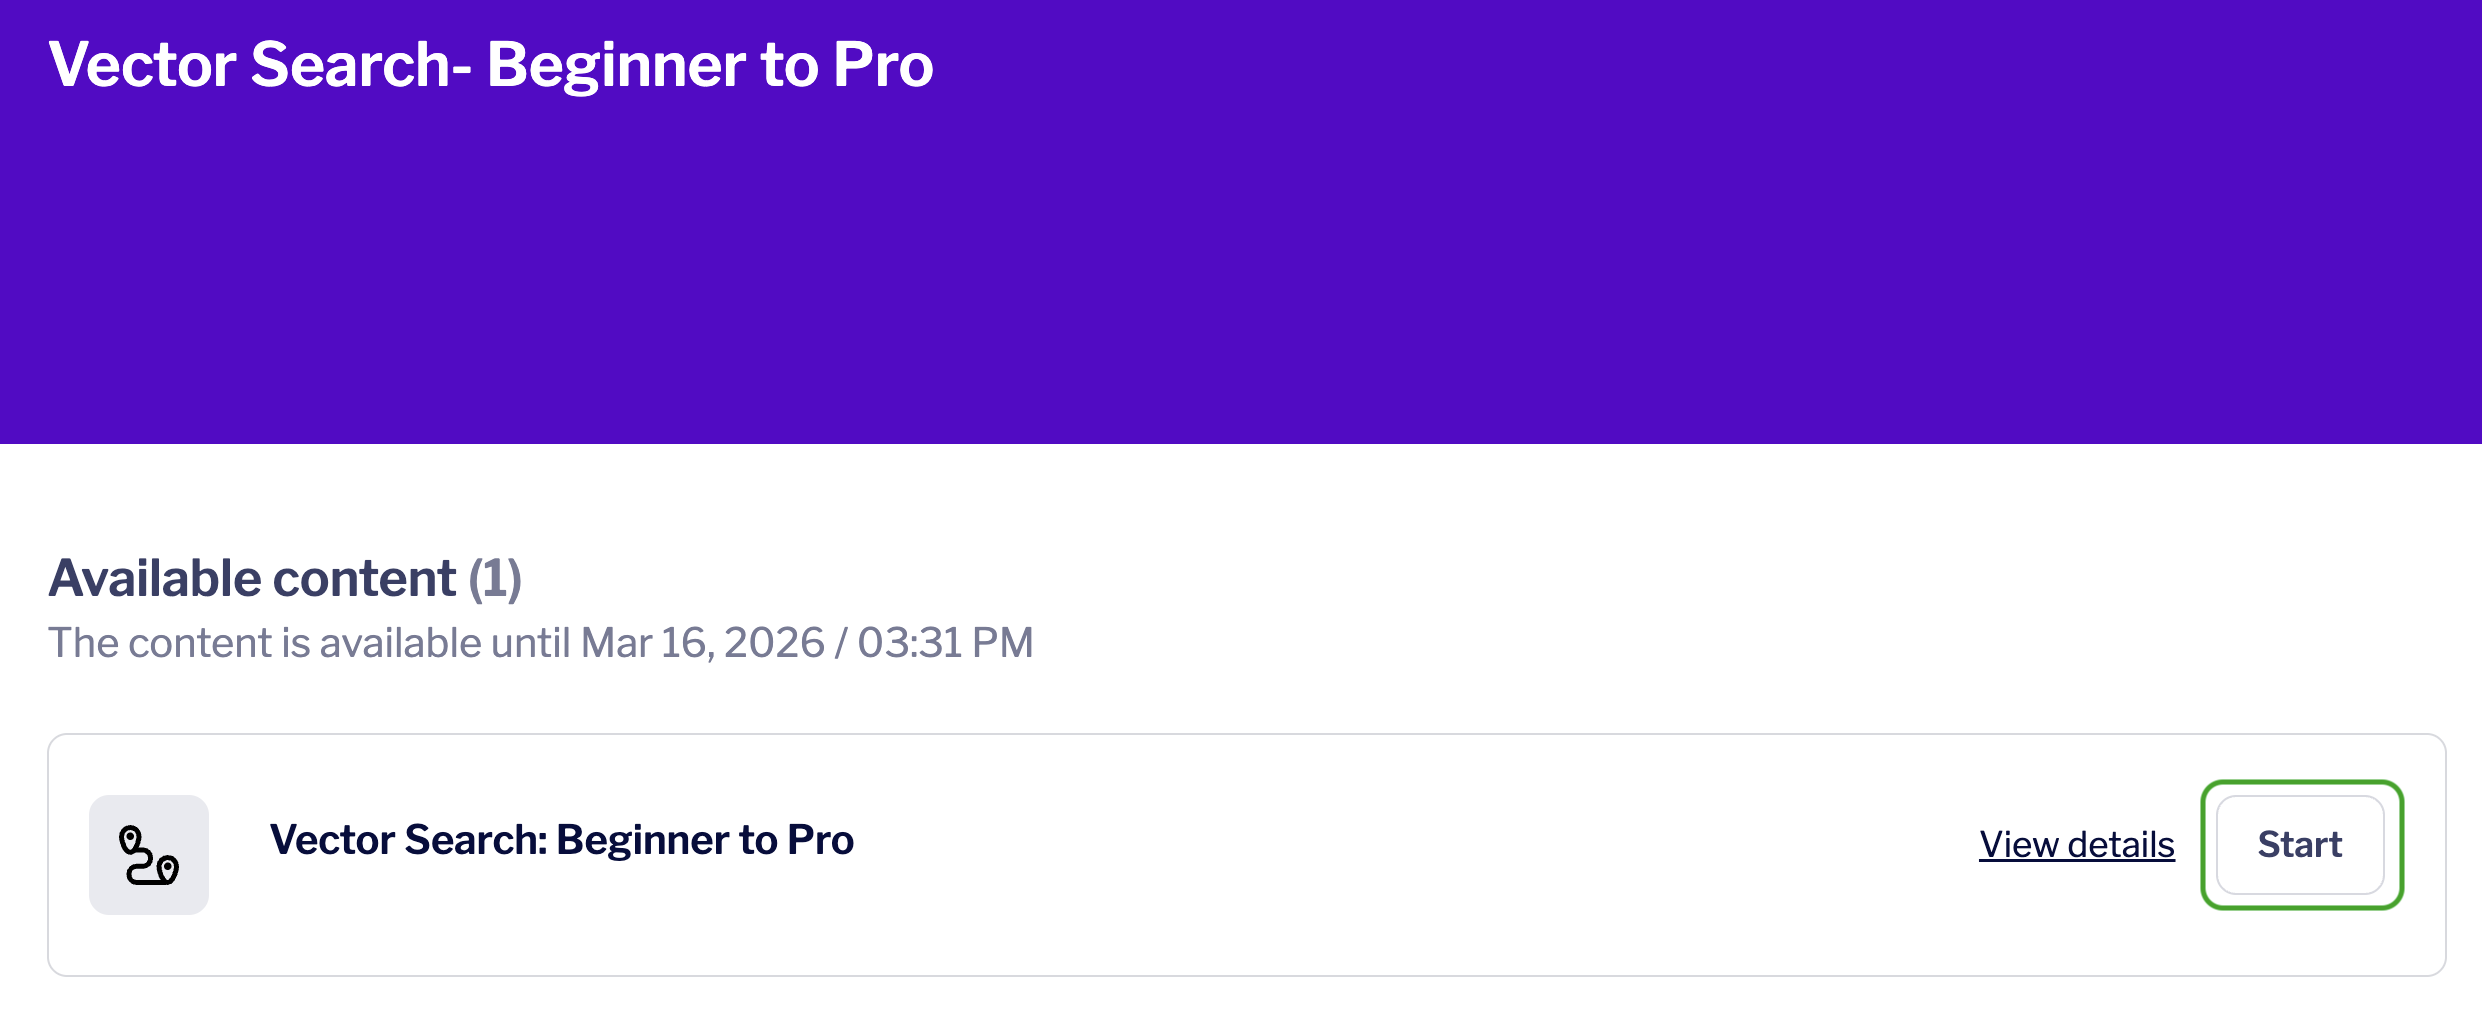
Click Start to launch the lab environment.
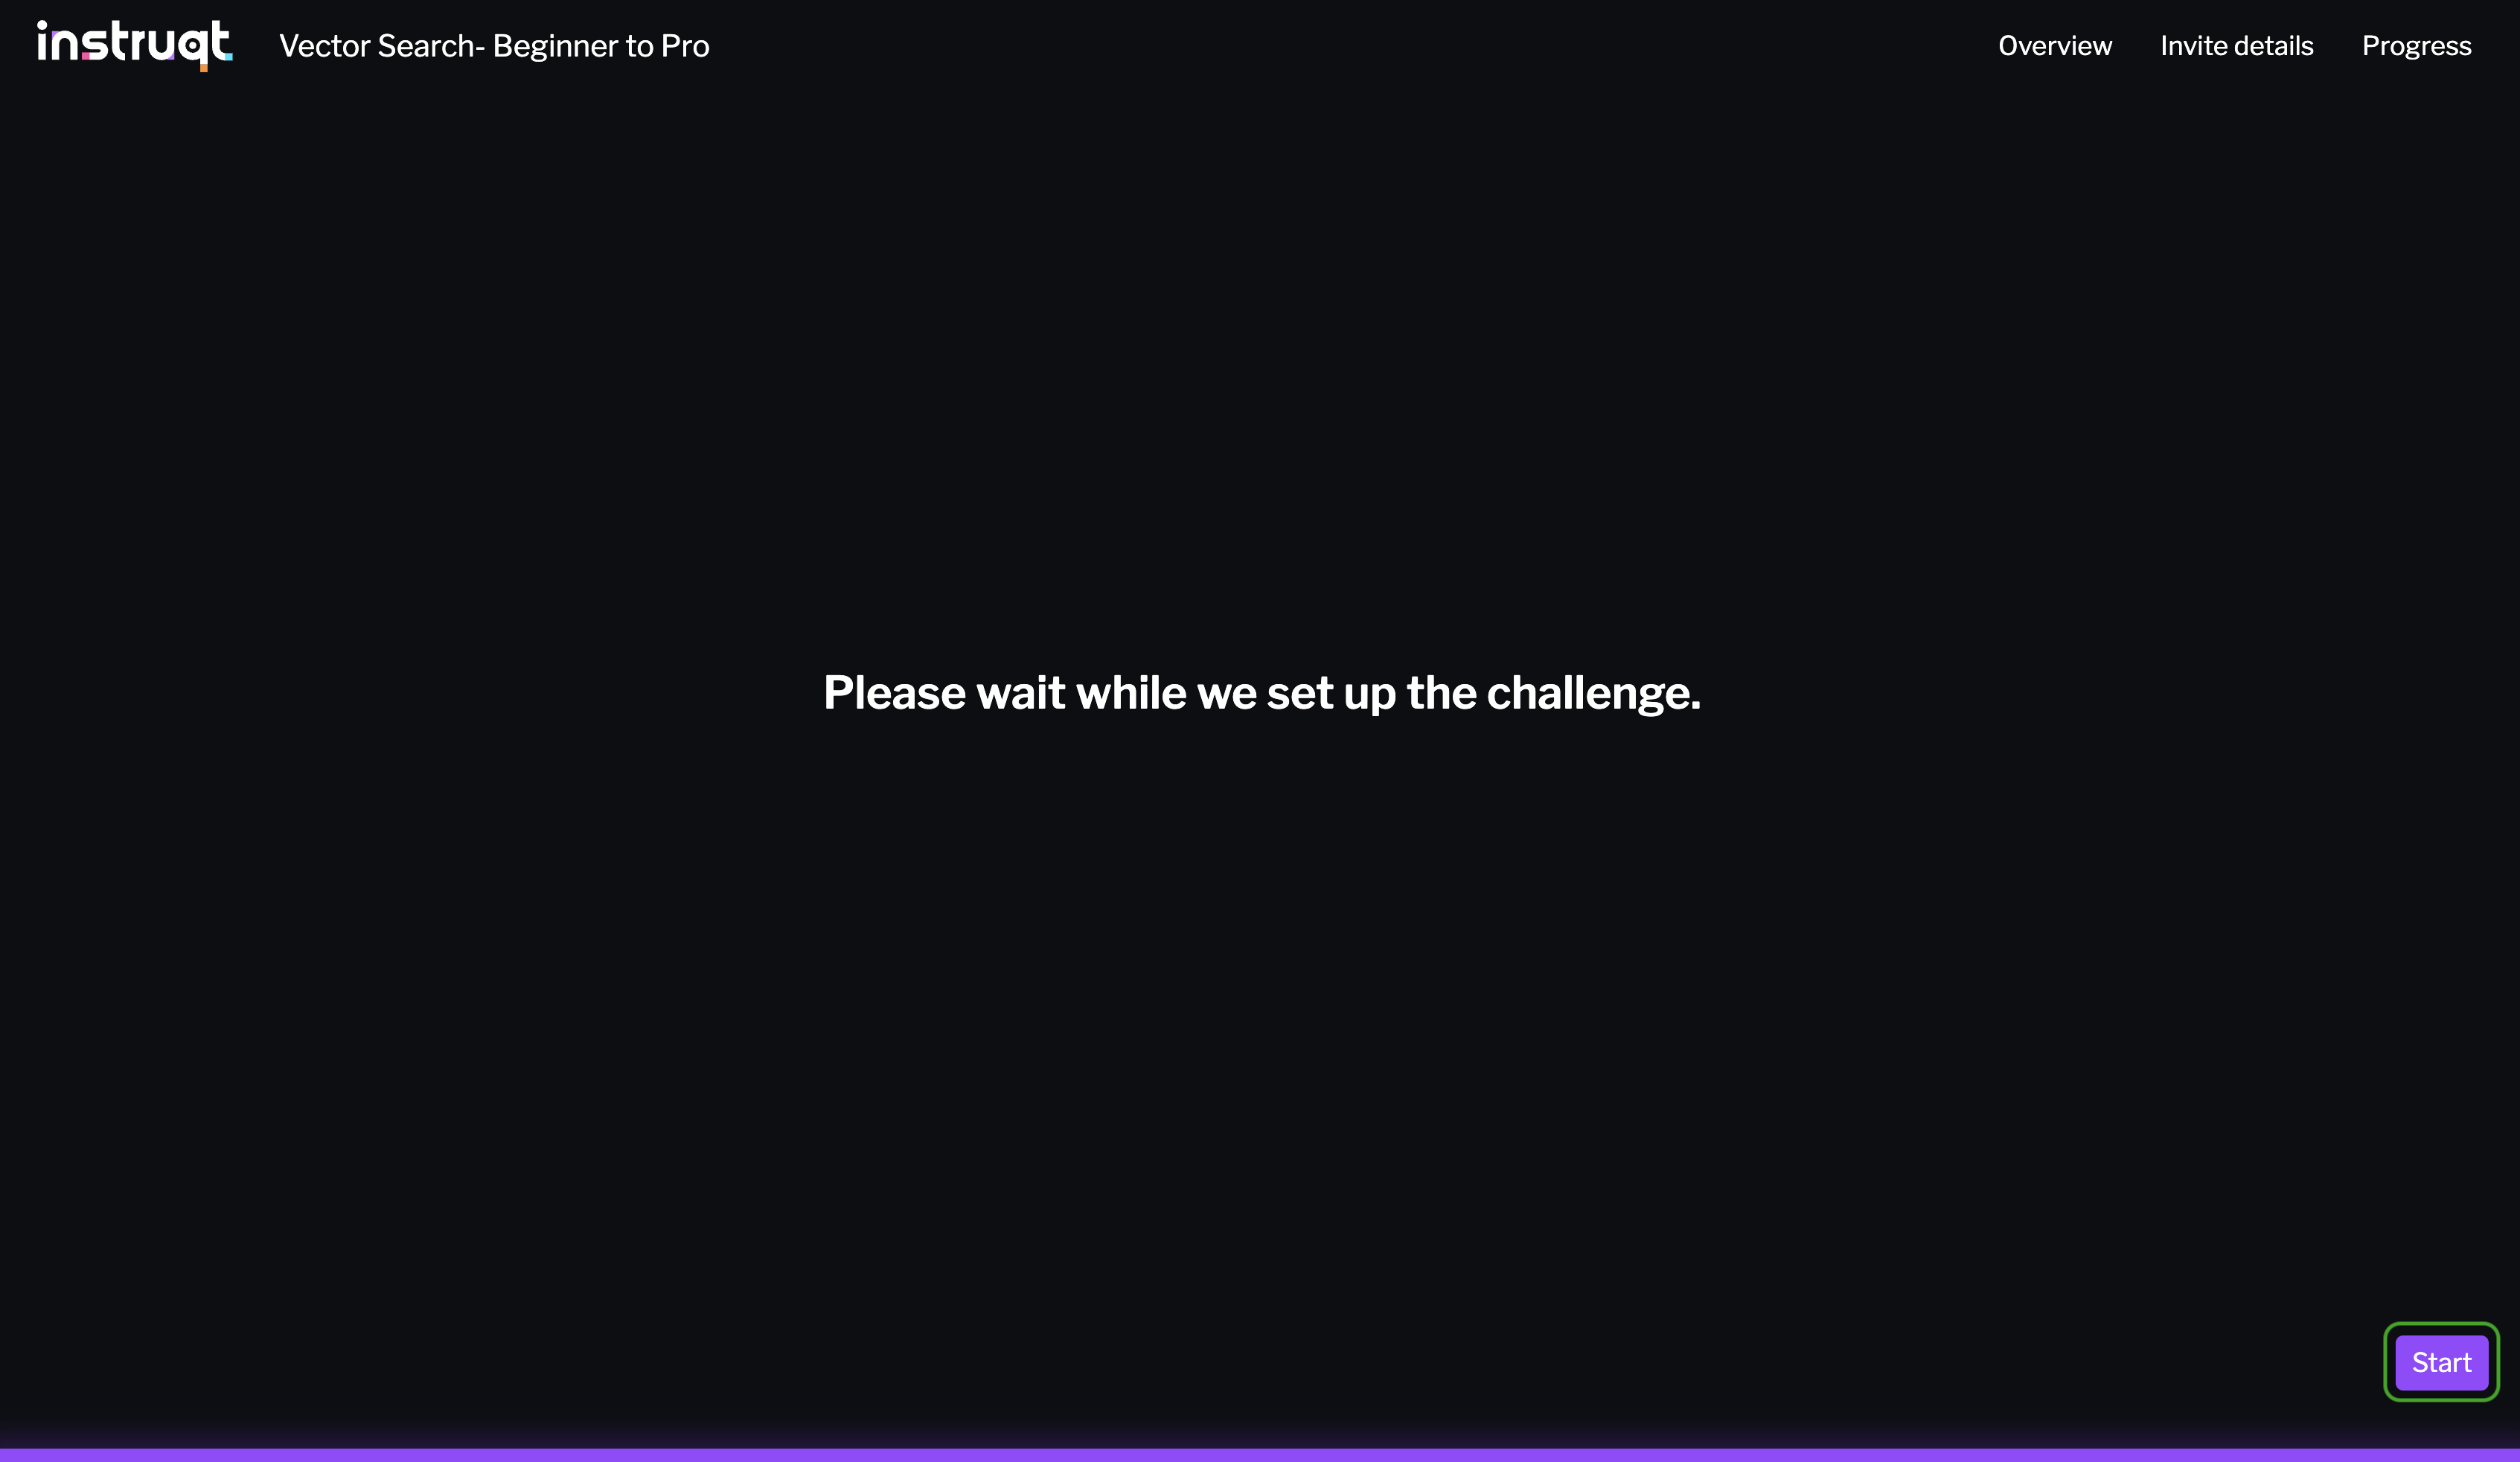
You should see a screen with a purple progress bar indicating that Instruqt is preparing a sandbox with all the required libraries for this lab and a MongoDB cluster.
Once this is done, you should see a Start button at the bottom right of the screen. Click this to enter the lab.
Connect to the MongoDB cluster
The sandbox is pre-configured with a local MongoDB cluster. Let's connect to it. This will allow you to view data we import into the cluster later in the lab, directly from the VSCode IDE.
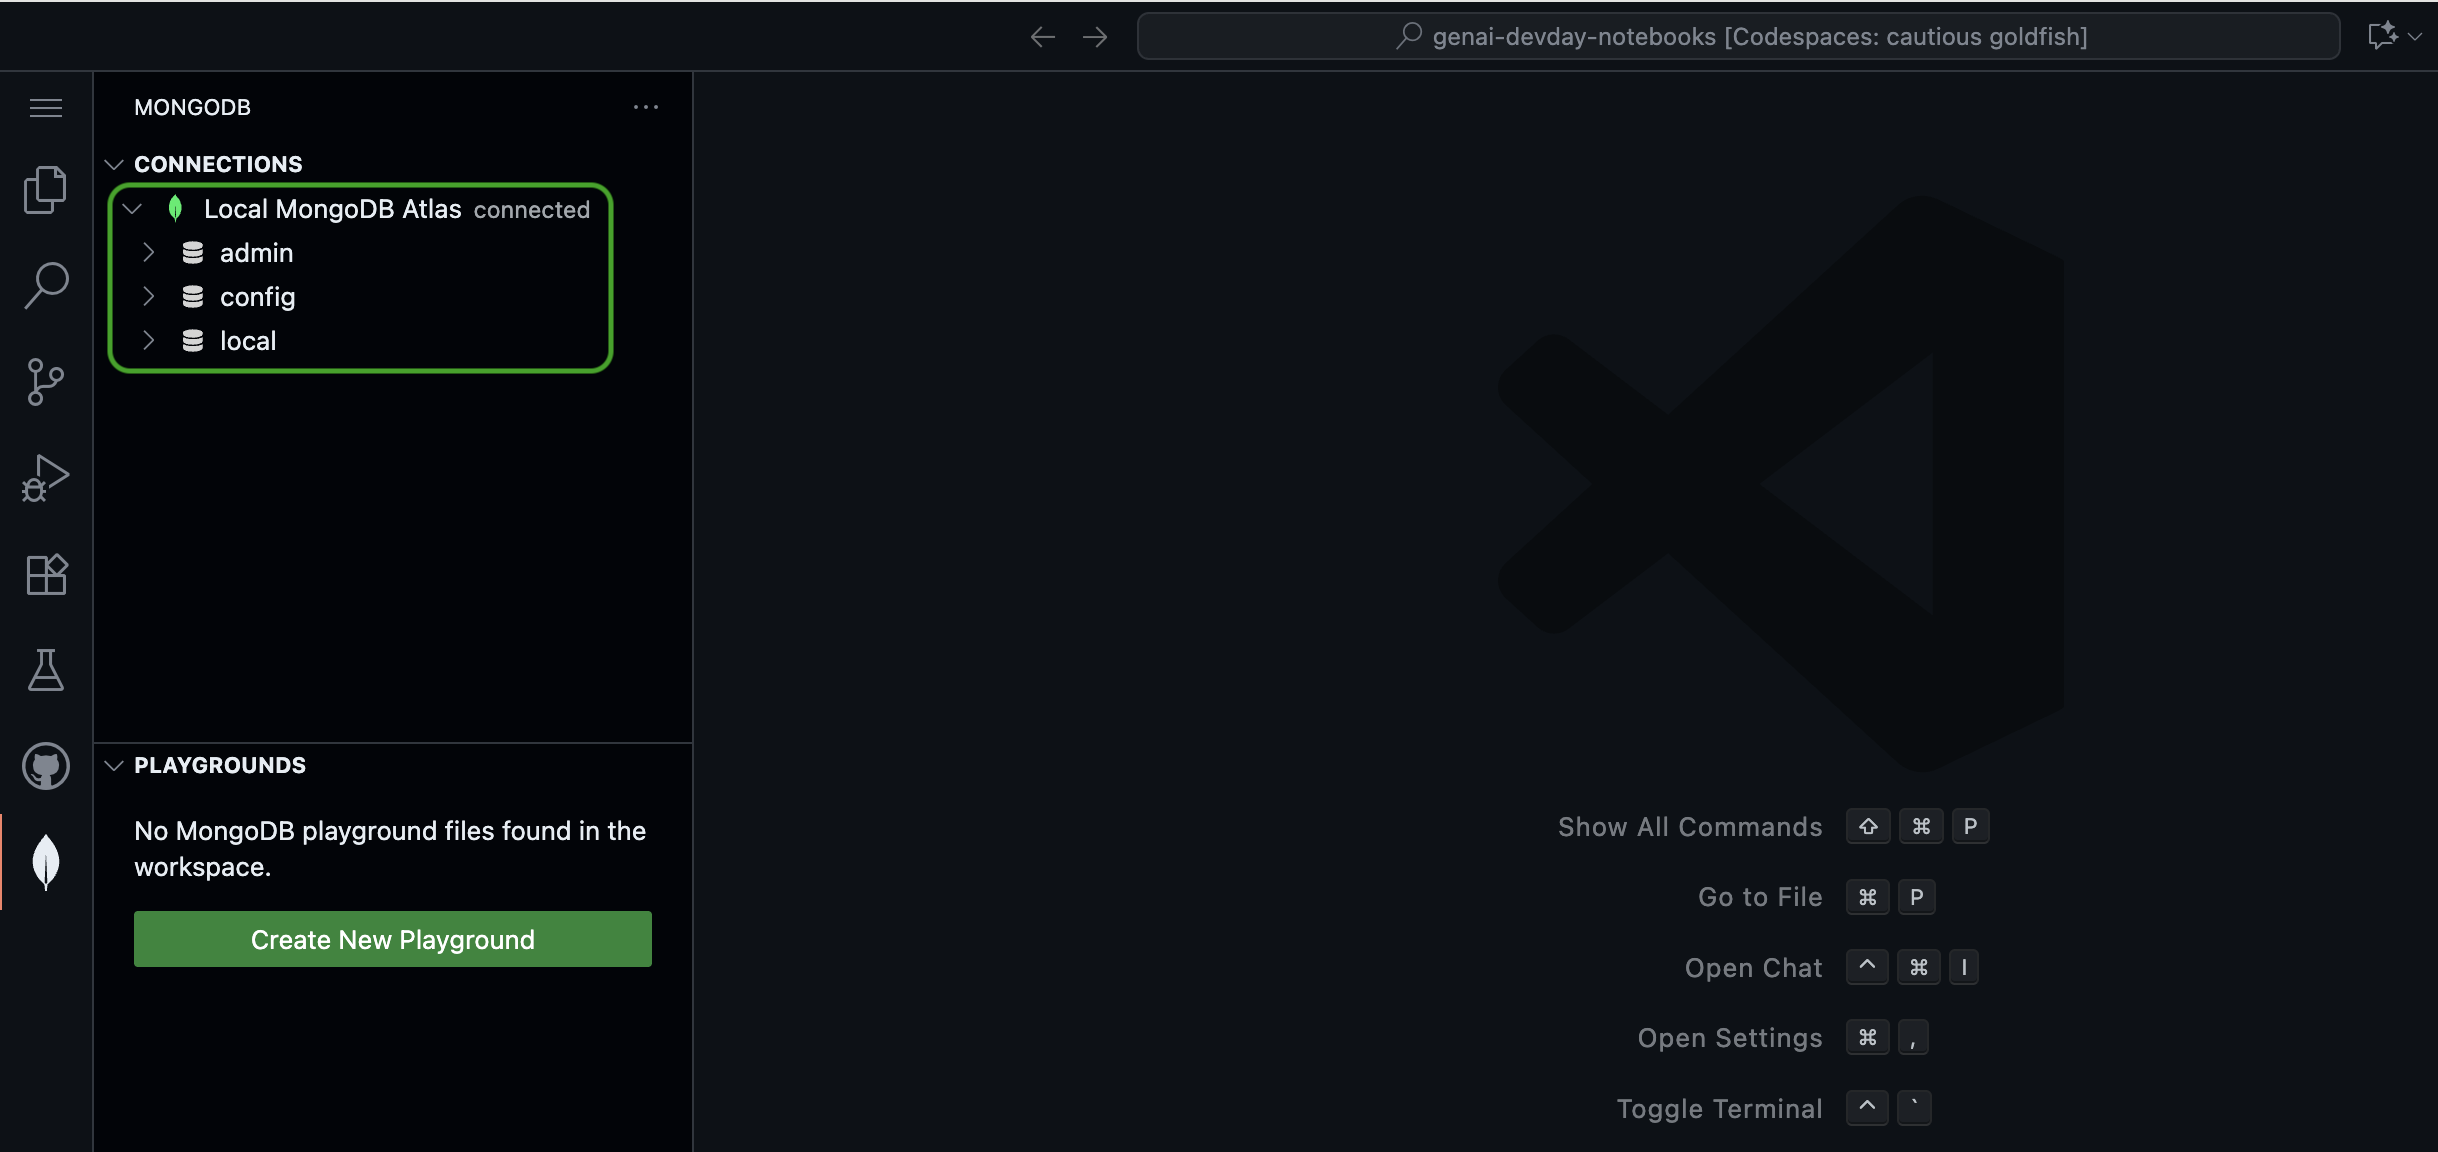
To do this, click the leaf icon in the left navigation bar of the IDE. This is MongoDB's VSCode extension.
Under Connections, click the Local MongoDB Atlas connection. This should automatically establish a connection to the local MongoDB cluster running on port 27017.
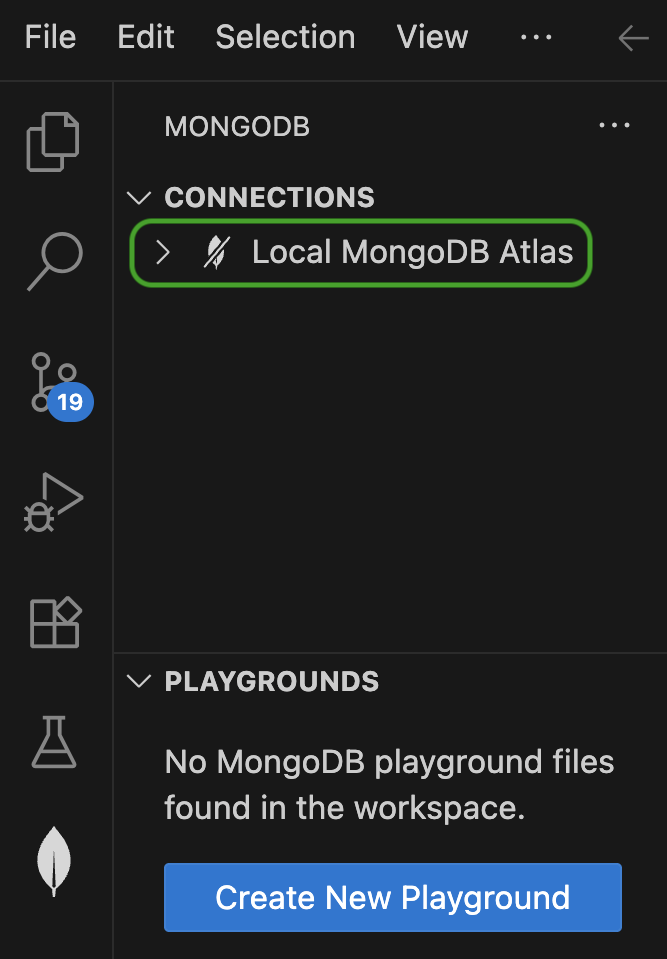
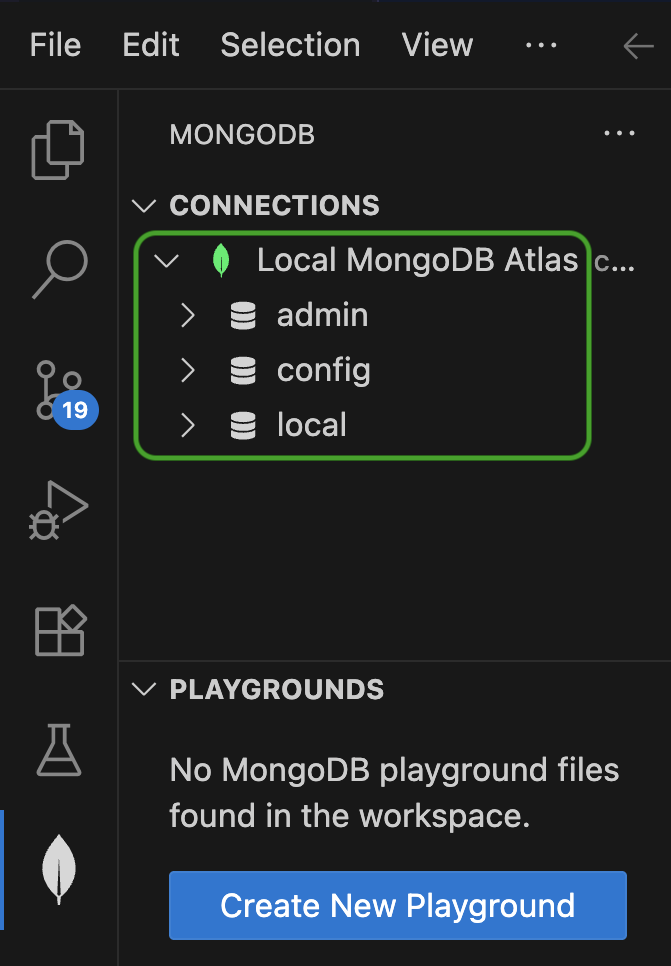
If the connection was successful, you should see a green leaf appear next to the Local MongoDB Atlas connection.
You will also see the default databases in the cluster appear under Connections. Any additional databases created during the lab will also appear here.
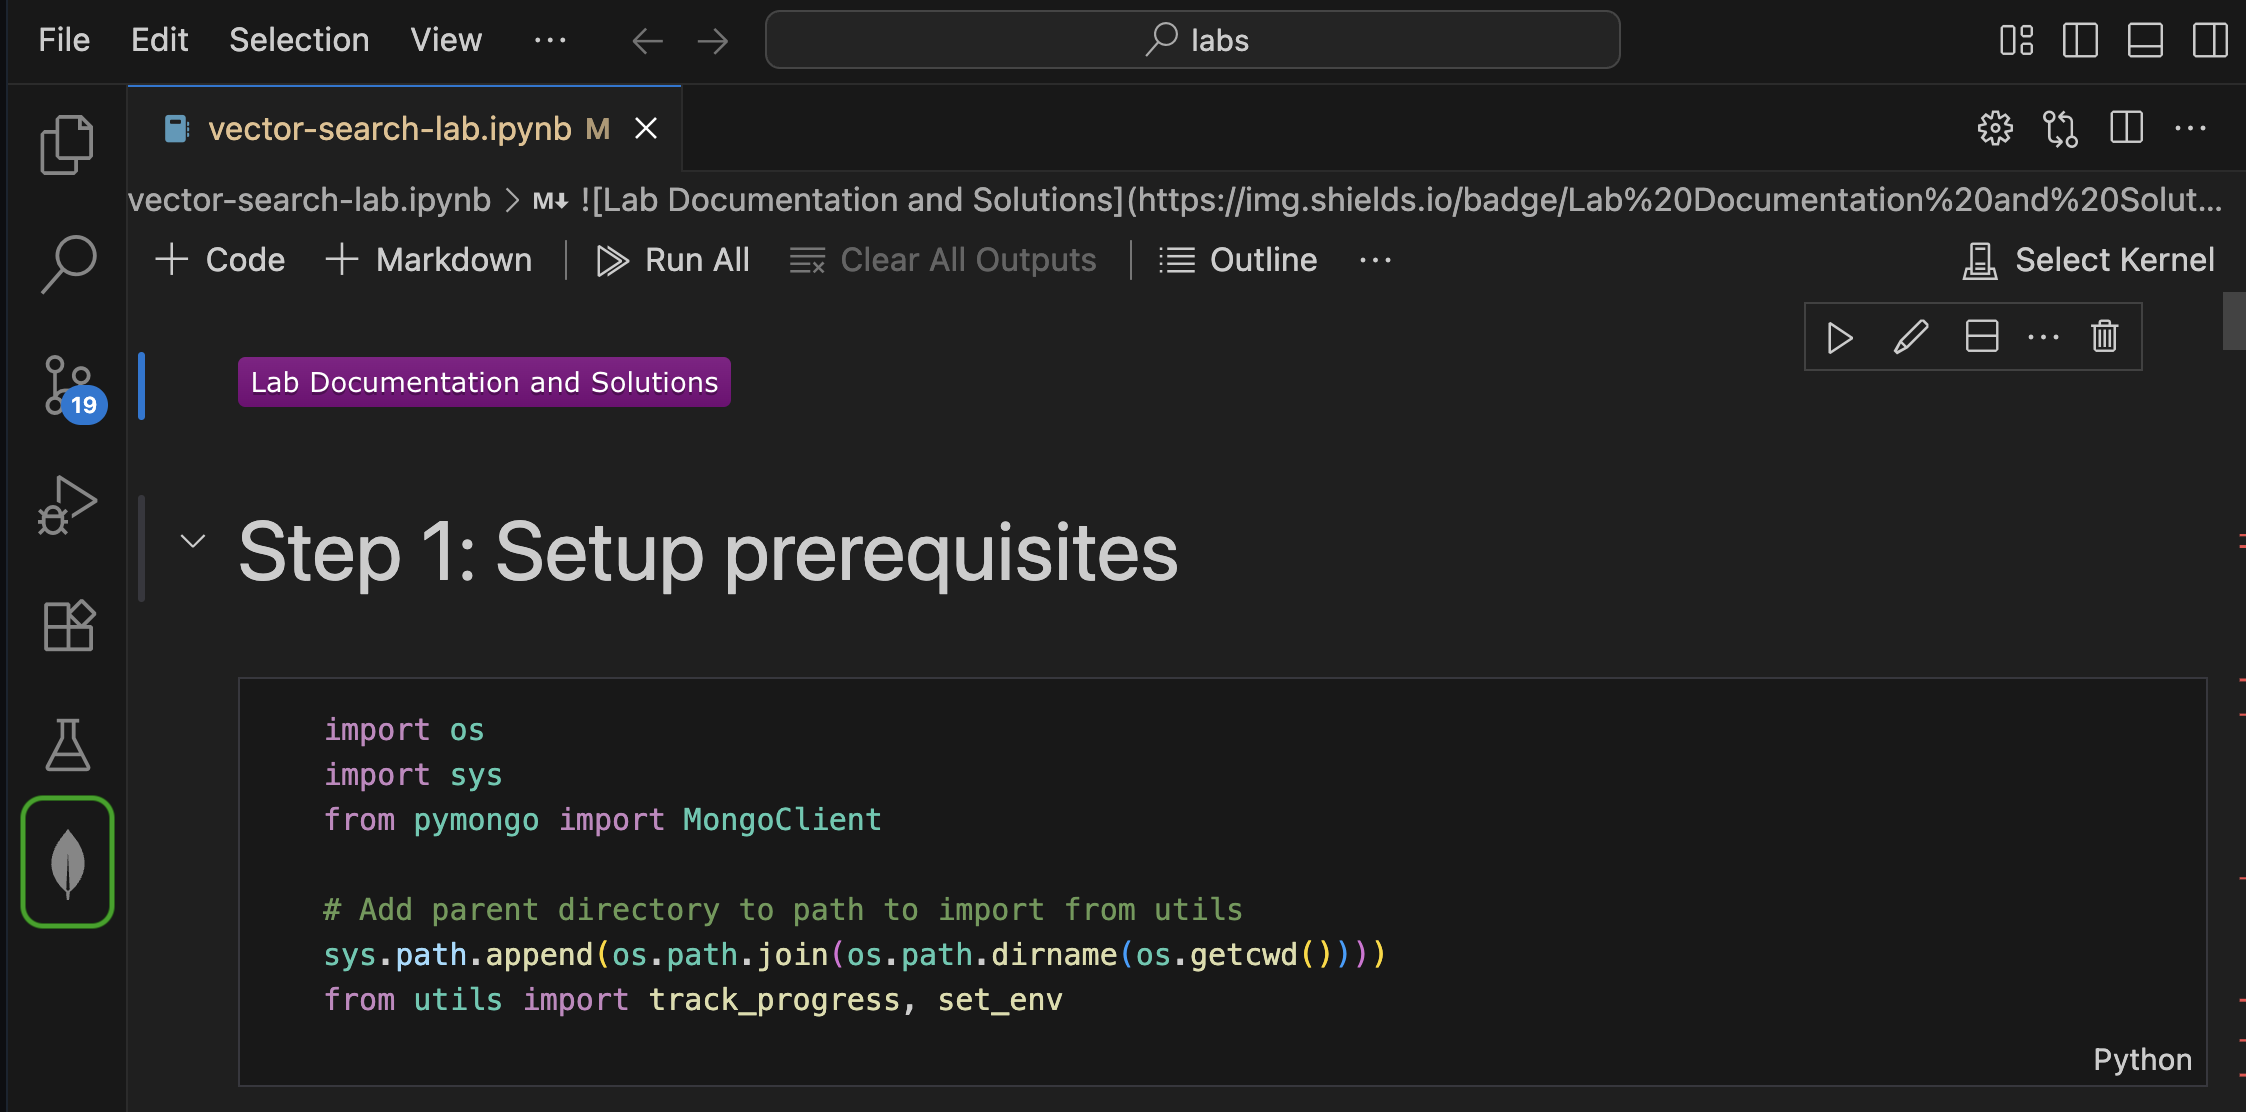
Jupyter Notebook setup
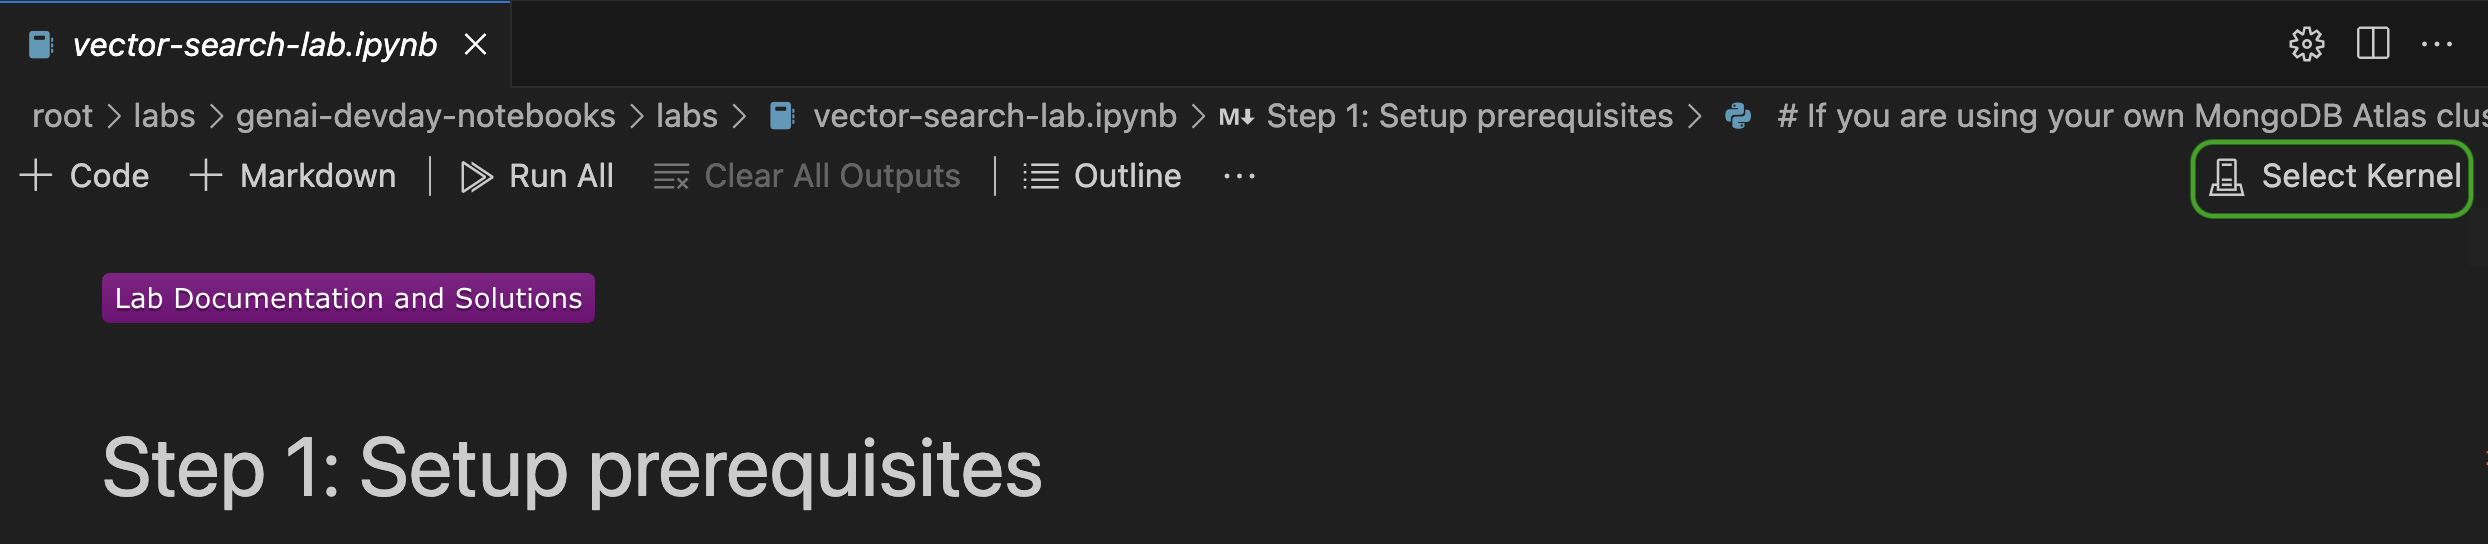
Based on the lab you're in, the right lab notebook will automatically open up in the Code Editor upon startup.
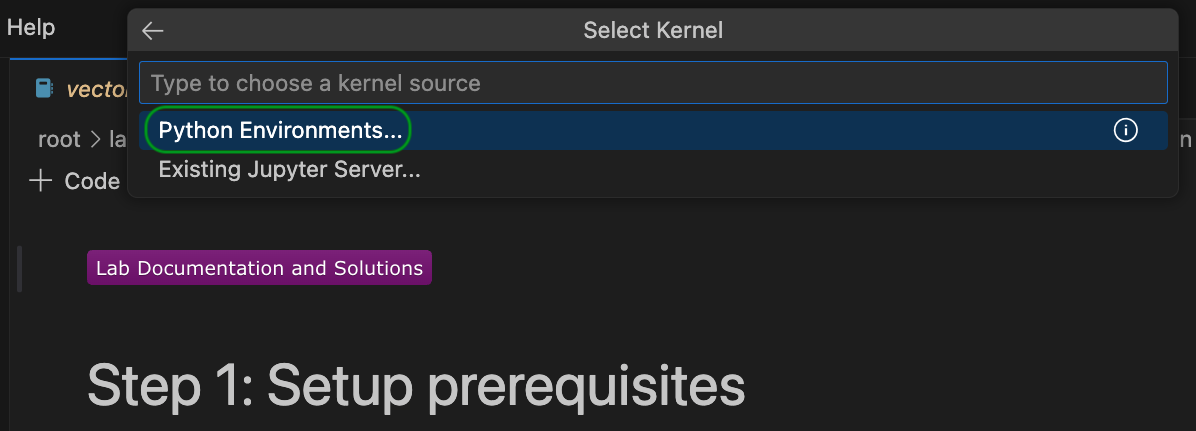
Select the Python interpreter by clicking Select Kernel at the top right of the IDE.
In the modal that appears, click Python environments... and select the interpreter that is marked as Recommended or Global Env.
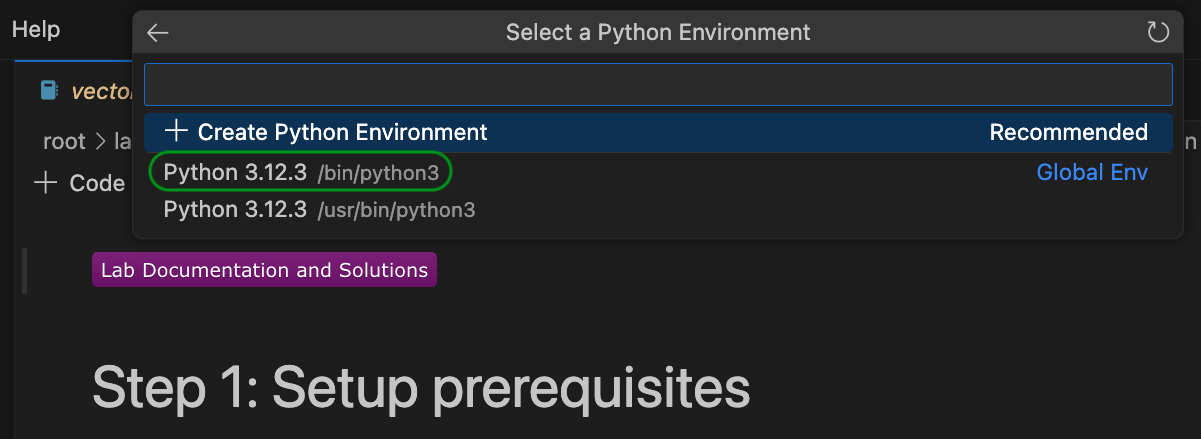
That's it! You're ready for the lab!
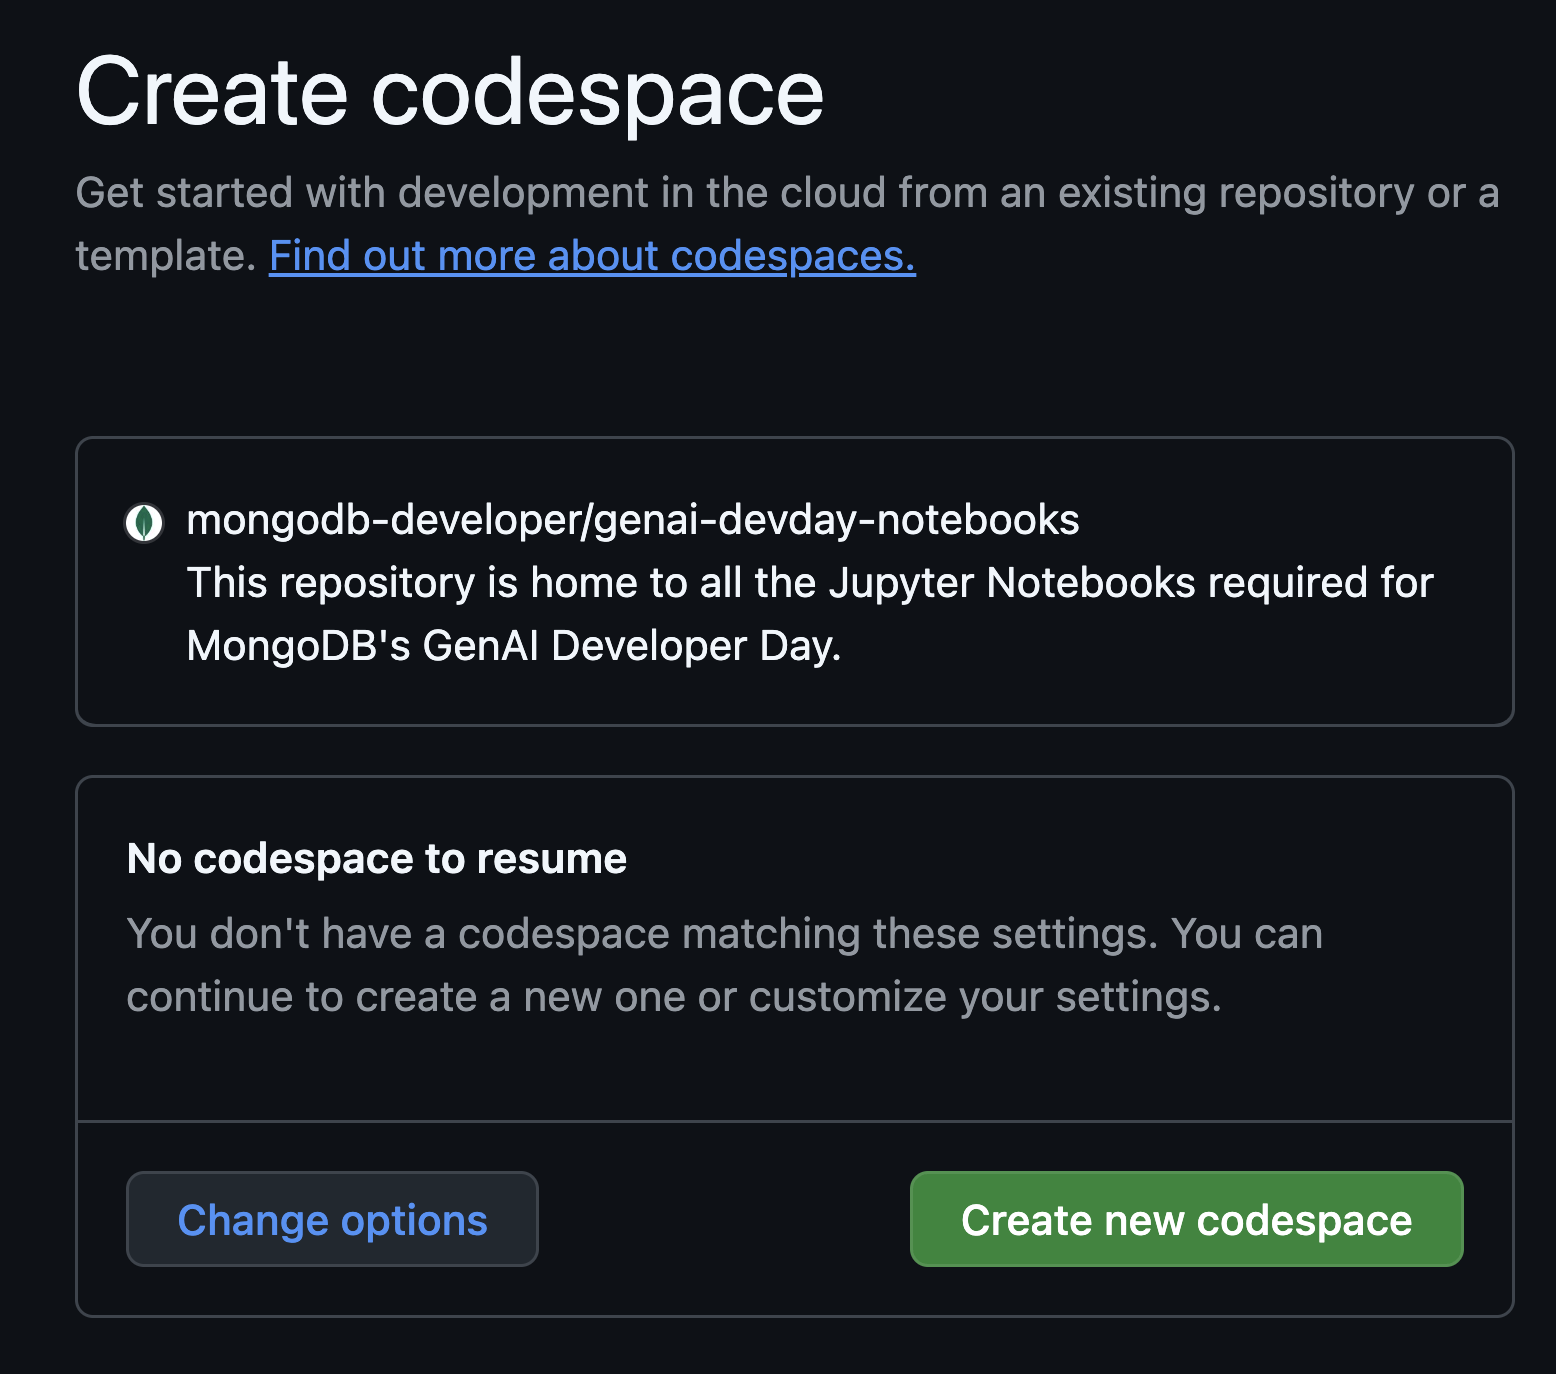
A codespace is a cloud-hosted development environment from GitHub, that comes pre-configured with all the tools you need to run this lab.
To create a codespace, navigate to this link. You will be prompted to sign into GitHub if you haven't already. Once signed in, click the Create new codespace button to create a new codespace.
Let it run for a few seconds as it prepares a Docker container with all the required libraries and a MongoDB cluster.
You can use the same codespace to run multiple labs. If you come back to a codespace after a break, you might need to resume it. To do so, navigate to this link and click Resume this codespace.
Connect to the MongoDB cluster
The codespace is pre-configured with a local MongoDB cluster. Let's connect to it. This will allow you to view data we import into the cluster later in the lab, directly from the VSCode IDE.
To do this, click the leaf icon in the left navigation bar of the IDE. This is MongoDB's VSCode extension.
Under Connections, click the Local MongoDB Atlas connection. This should automatically establish a connection to the local MongoDB cluster running on port 27017.
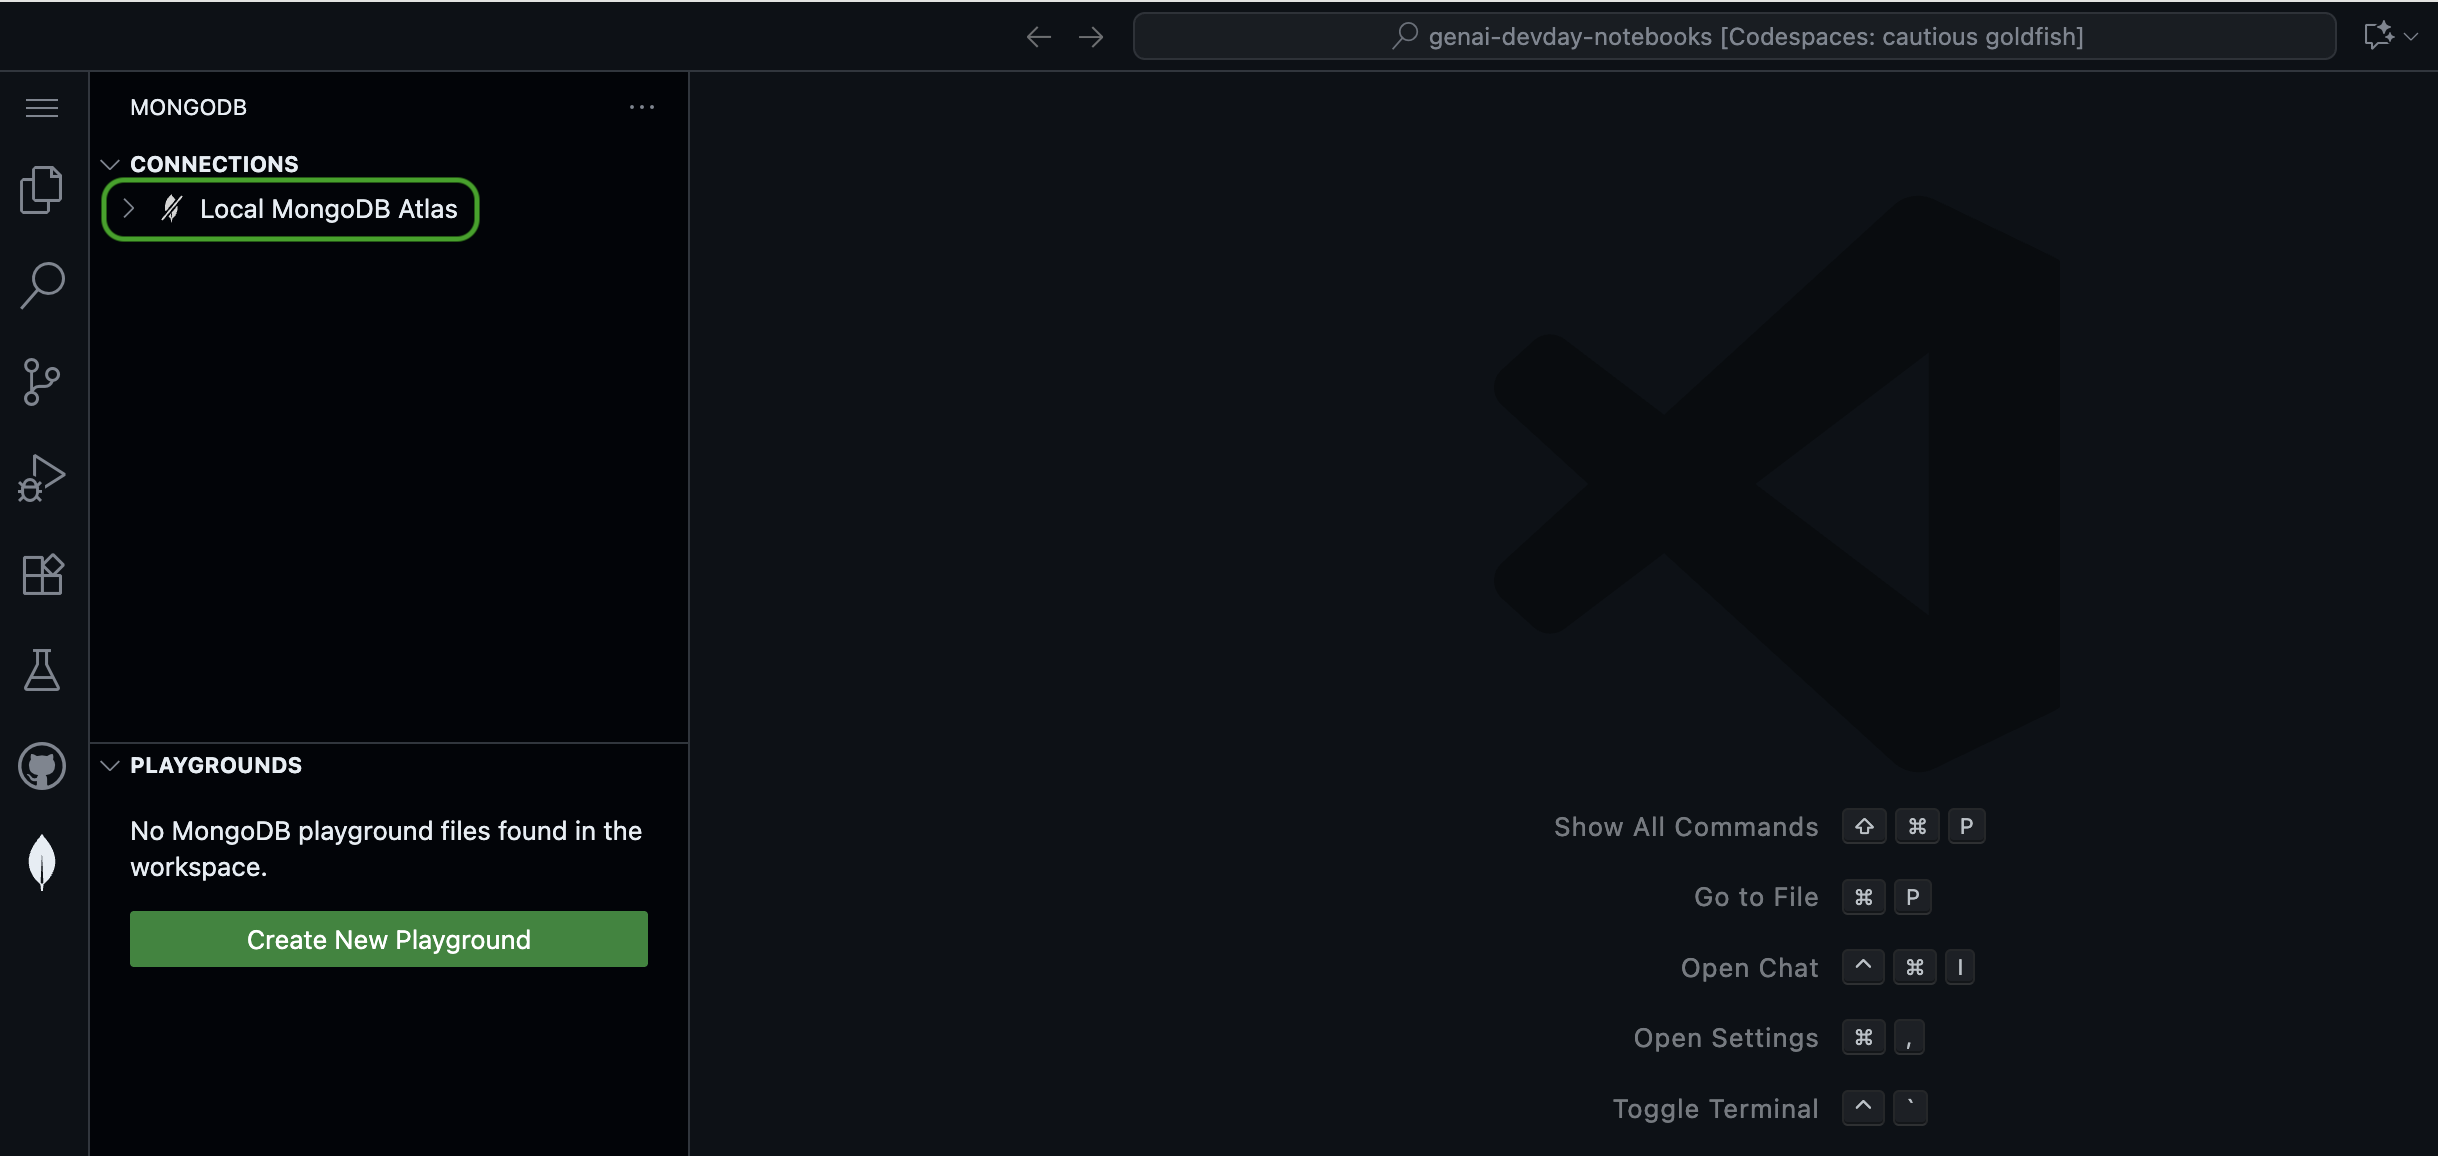
If the connection was successful, you should see a green leaf appear next to the Local MongoDB Atlas connection.
You will also see the default databases in the cluster appear under Connections. Any additional databases created during the lab will also appear here.
Jupyter Notebook setup
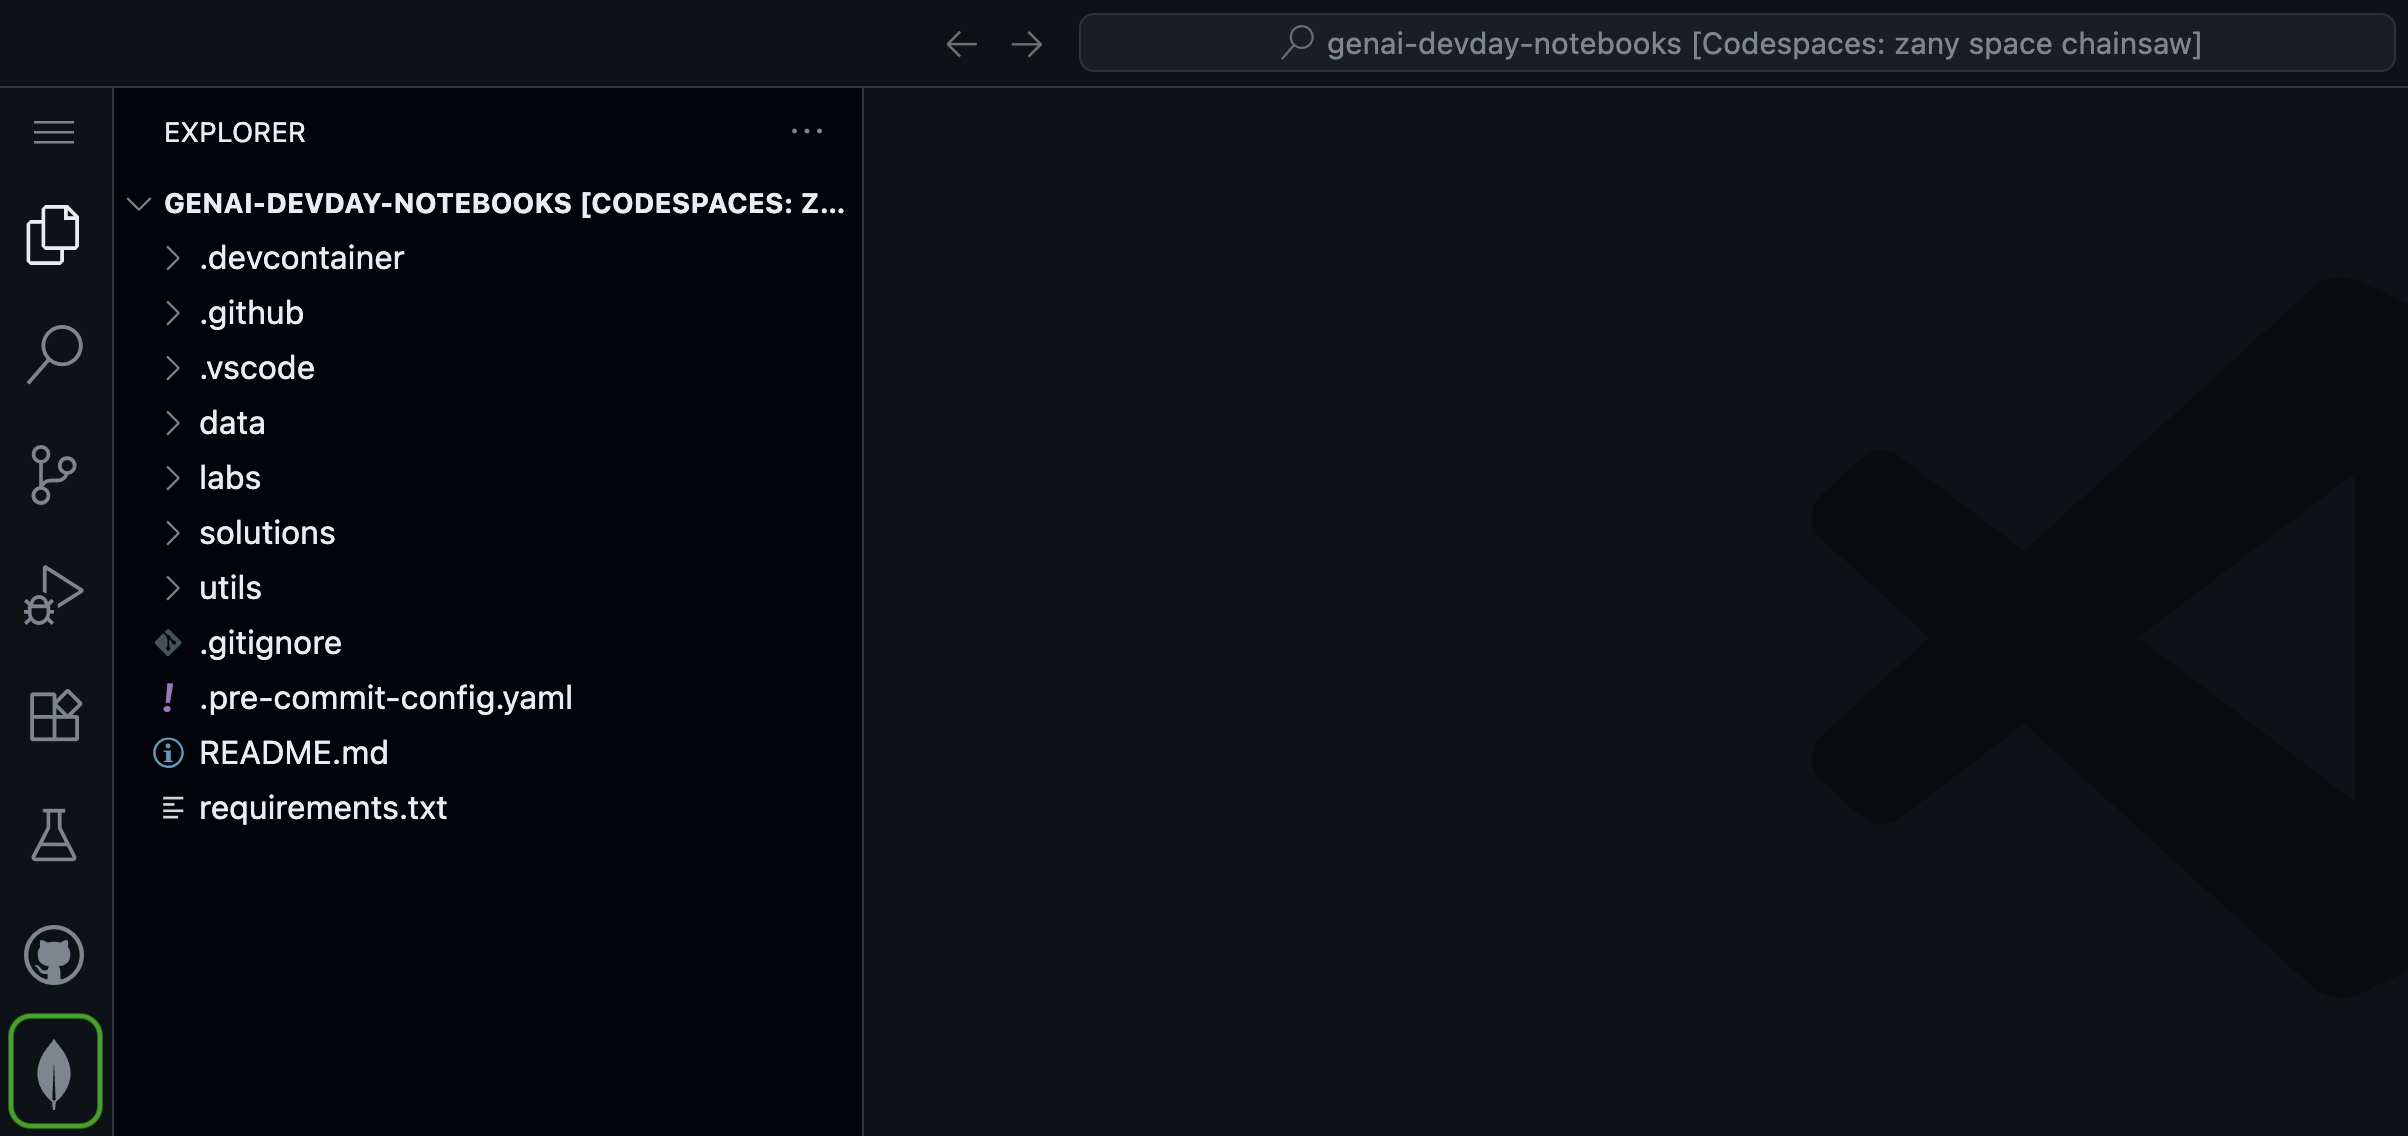
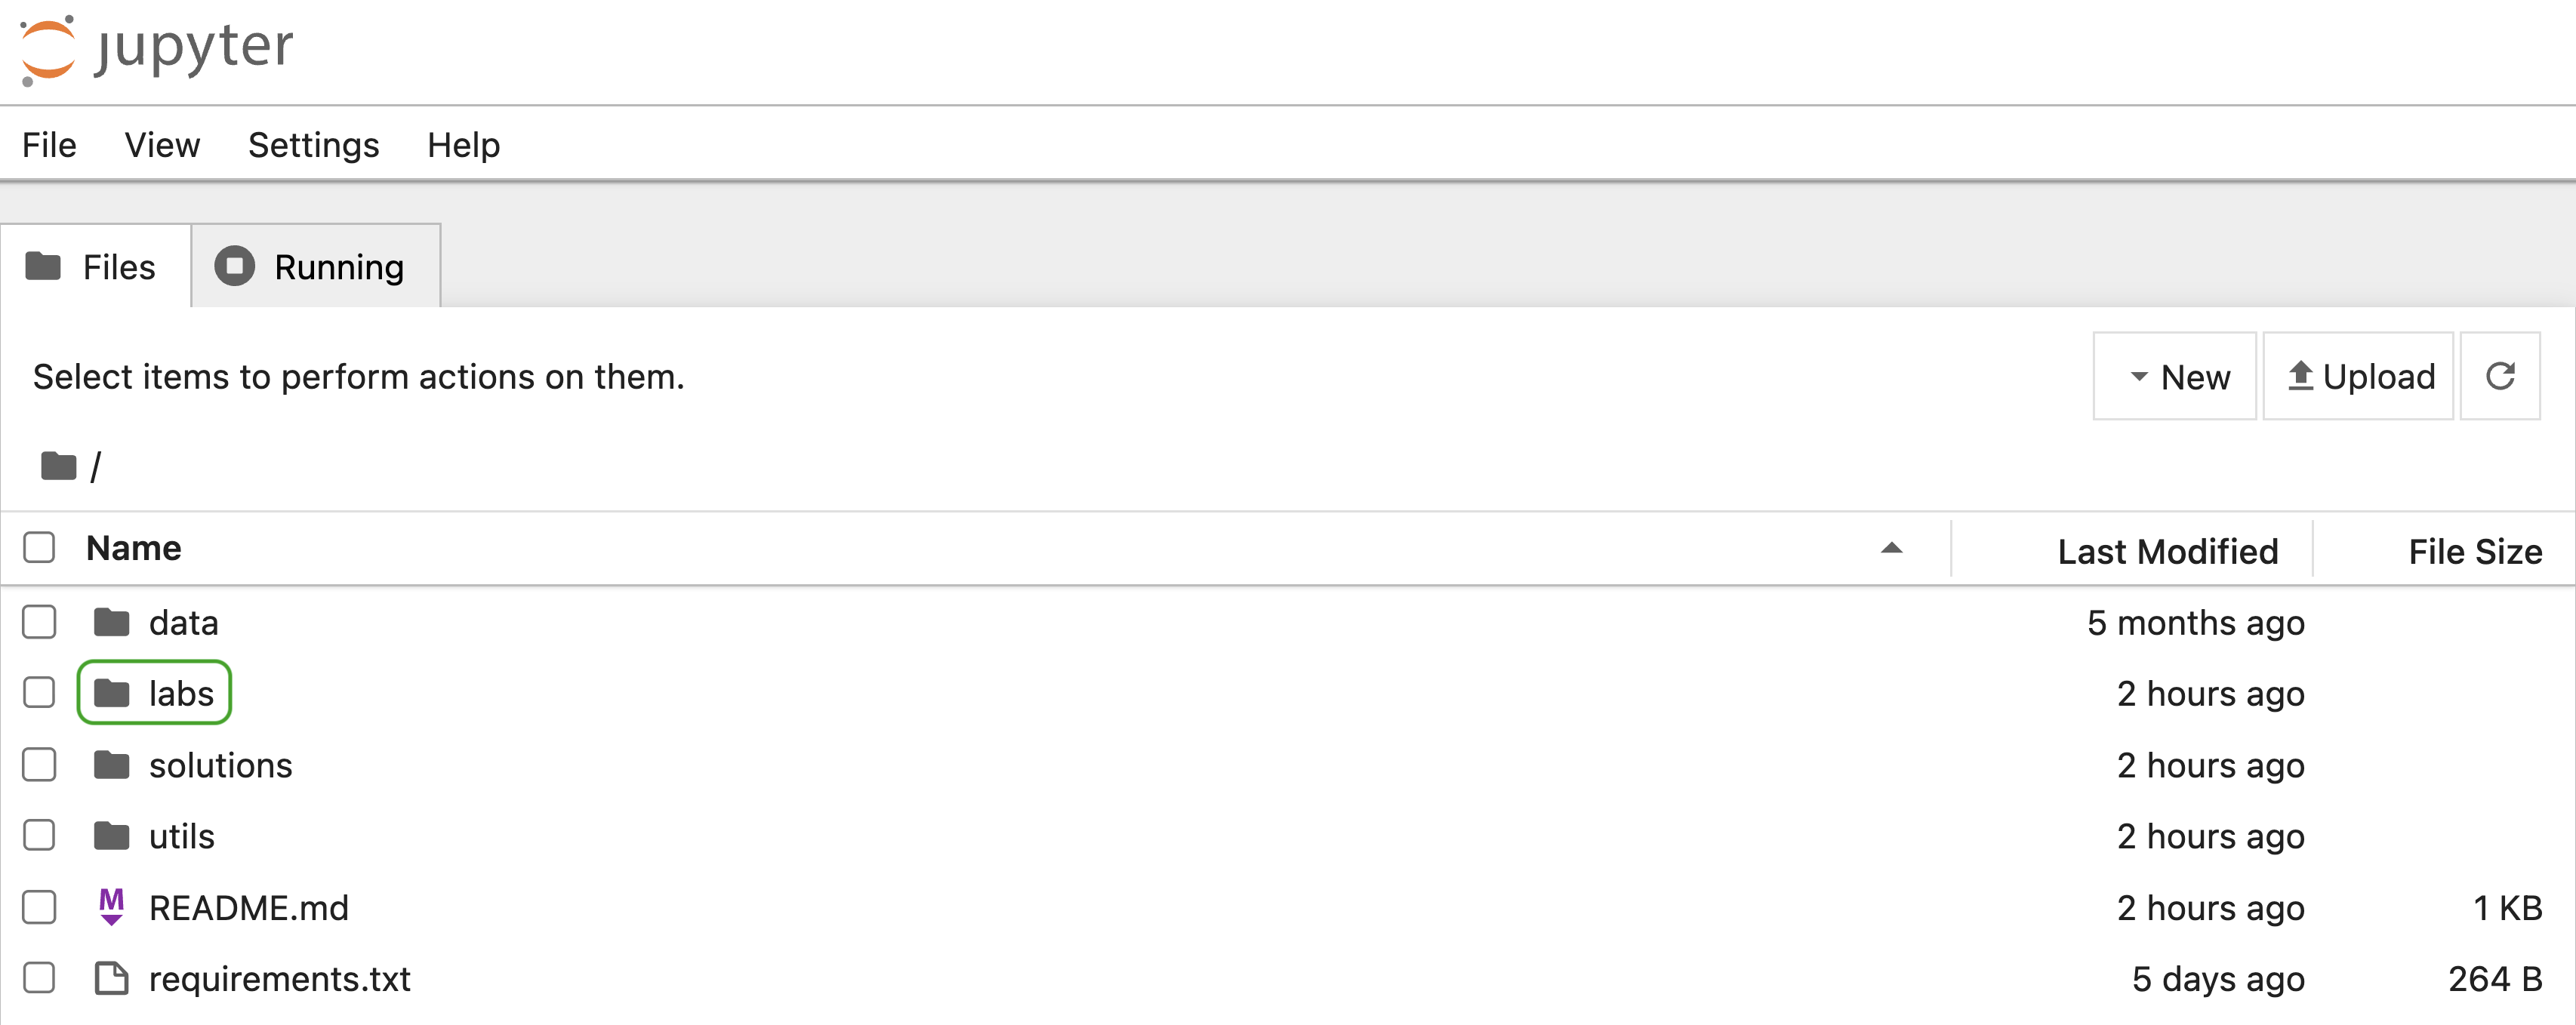
Within the codespace, click on the files icon in the left navigation bar of the IDE.
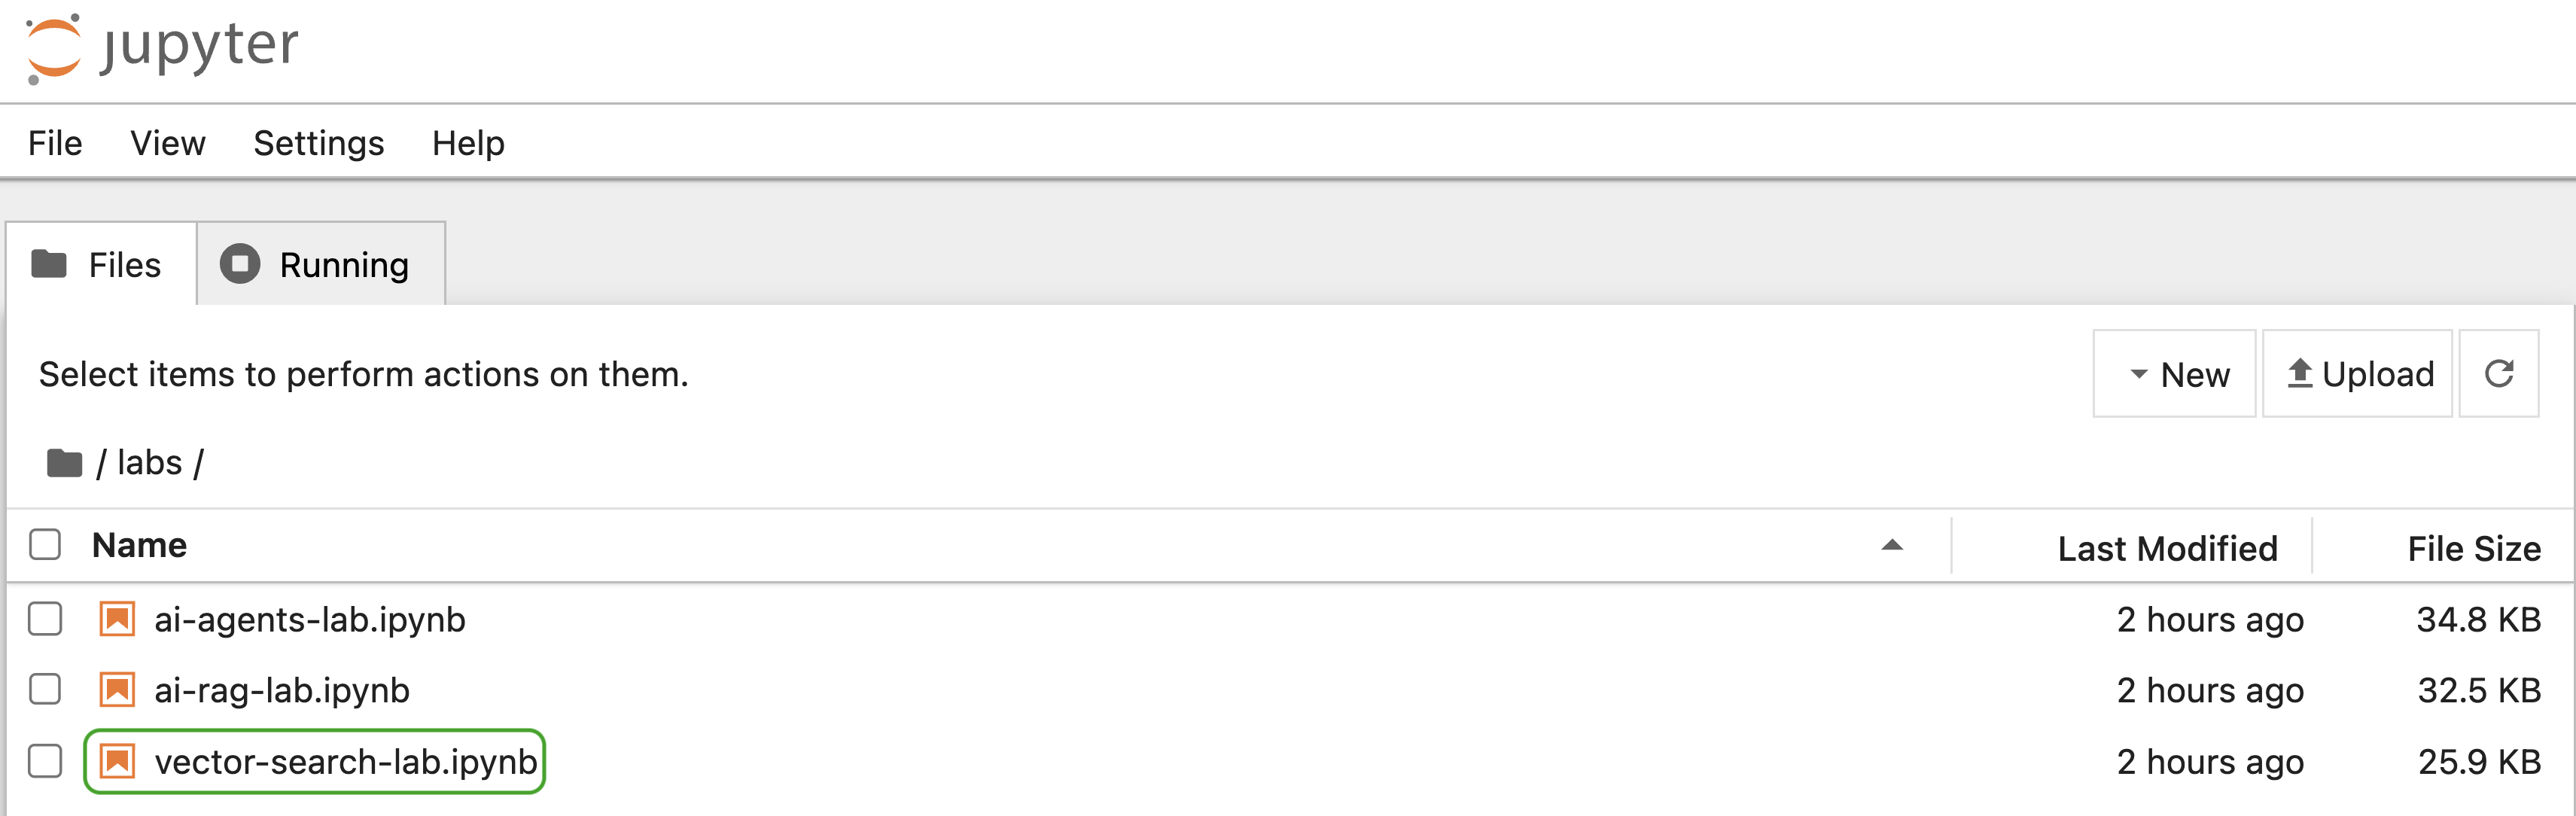
In the Explorer menu, under labs, you will find notebooks with self-explanatory names, one for each lab. Click on the notebook you want to work on.

That's it! You're ready for the lab!
Pre-solved notebooks are available under solutions. If you do not wish to type out the code yourself, open the corresponding notebook from this folder and simply run the cells.
To run the labs locally, follow the steps below:
- Clone the GitHub repo containing the labs by executing the following command from the terminal:
git clone https://github.com/mongodb-developer/genai-devday-notebooks.git
- Create and activate a Python virtual environment:
python -m venv ai-labs
source ai-labs/bin/activate
- Install the dependencies for the labs:
pip install -r requirements.txt
- Install and launch Jupyter Notebook:
pip install notebook
jupyter notebook
- In the browser tab that pops up, double-click on the
labsfolder.
You will find notebooks with self-explanatory names, one for each lab. Double-click on the notebook you want to work on.
Pre-solved notebooks are available under solutions. If you do not wish to type out the code yourself, open the corresponding notebook from this folder and simply run the cells.